Refinishing the Kitchen Table
Posted: 2021 June 29
Last updated: 2021 September 14
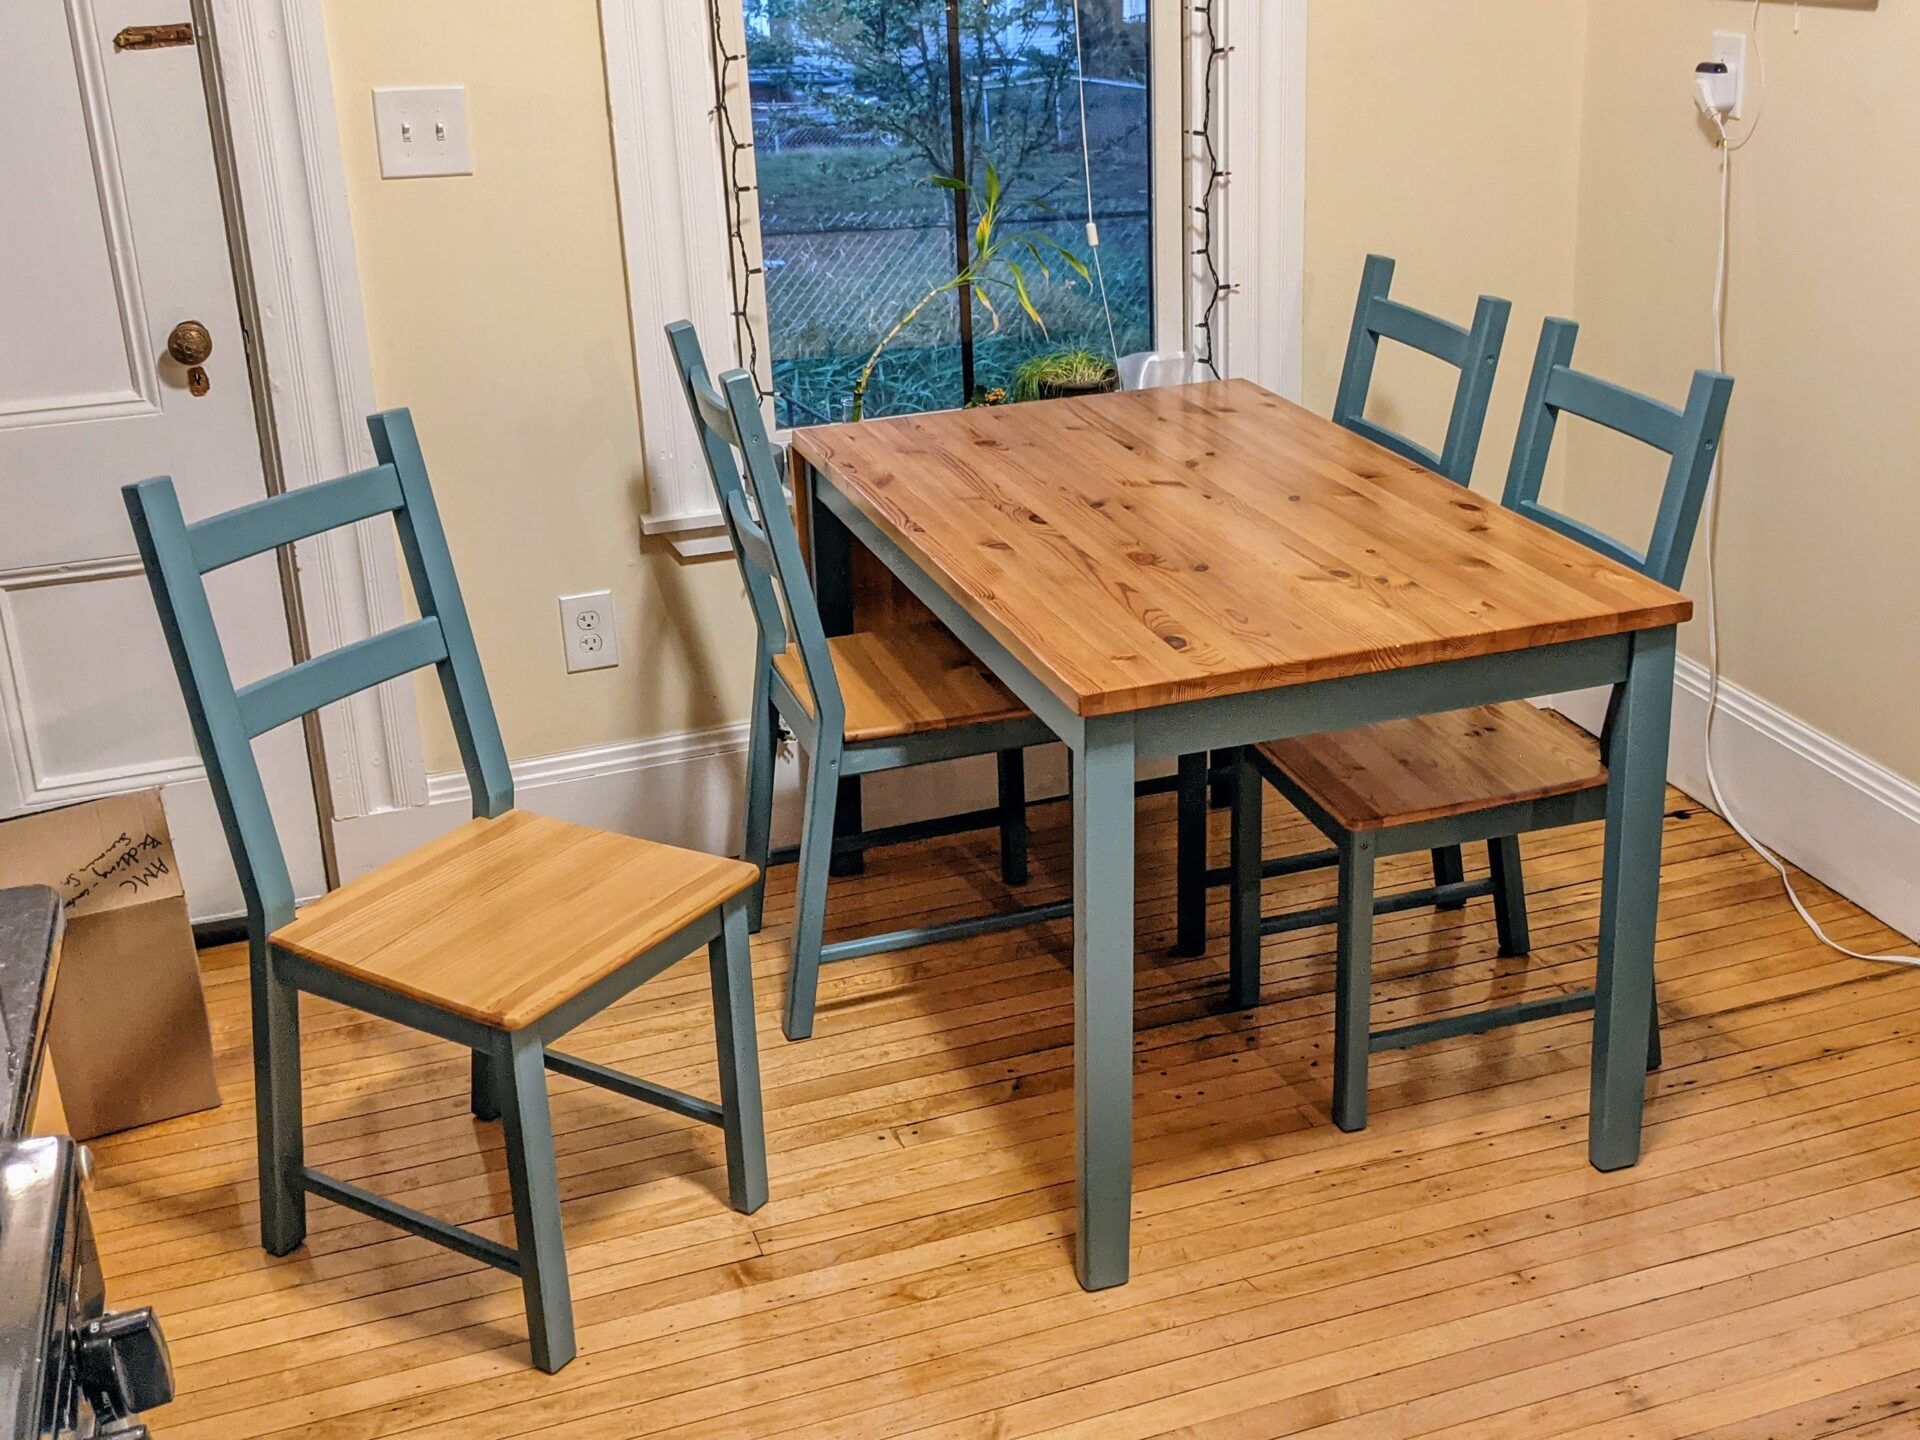
To satiate your curiosity, here’s the final product first:
And now for something completely different: refinishing a table. A completely analog project with no computers or electronics or CNC involved. It’s something I have next to no knowledge of, despite watching my dad do this stuff while I was growing up. It’s like realizing that you should have paid more attention in school.
This story starts with a hand-me-down table I got for free when someone in my lab got a nice, new table. This table served as a project table in my old apartment, but since Clark and I moved into our new place, it’s the kitchen table. And it was looking… well-loved, to put it nicely.
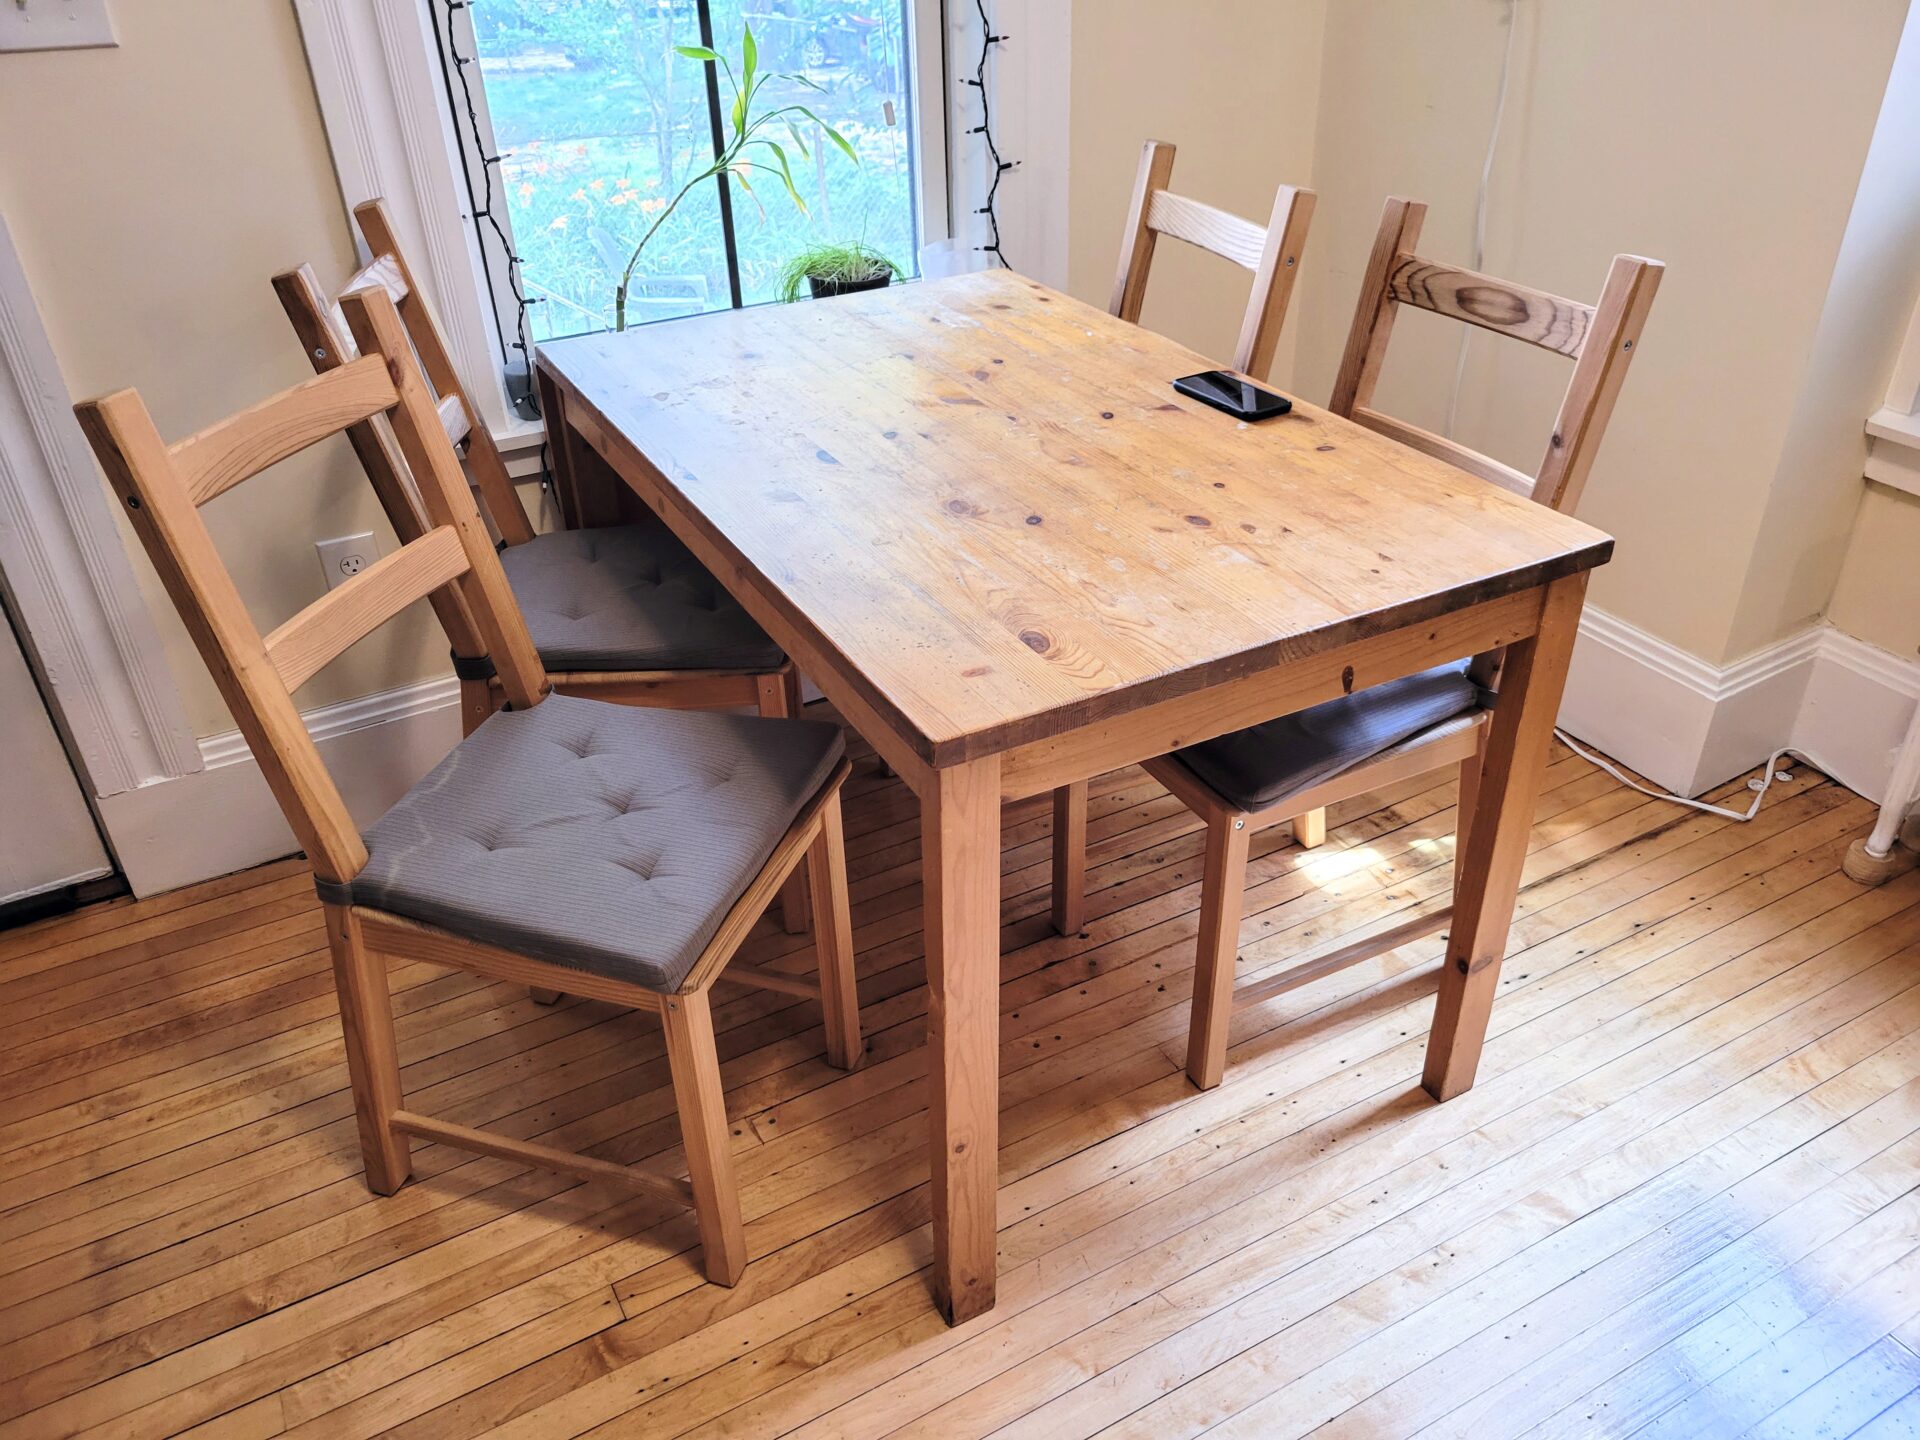
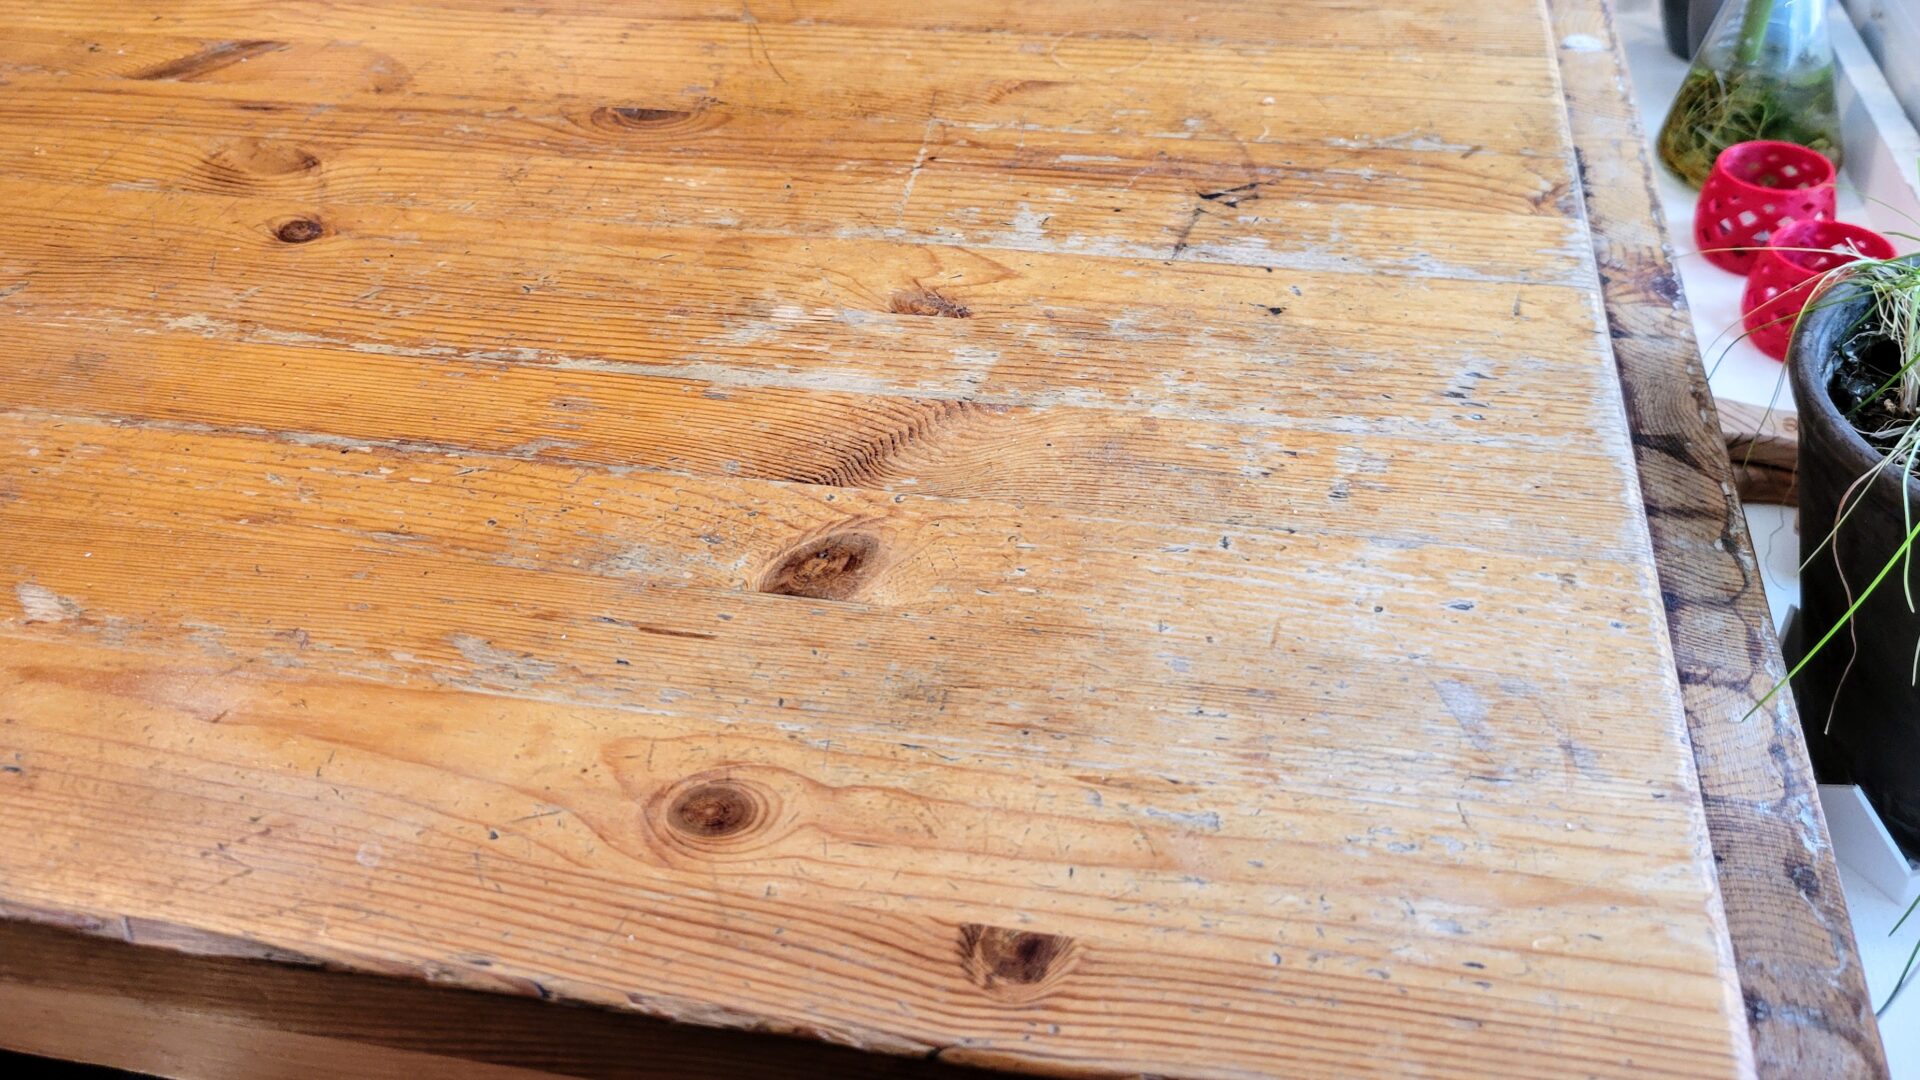
At one end of the table, it has a fold-down leaf that can extend it enough to squeeze in another person or two at dinner time. It also appears someone used that leaf as a cutting board at some point, since it was full of knife marks.
The finish on the top of table in general is in really bad shape. We pretty much always use placemats on the table because it just looks way better than showing that tabletop off.
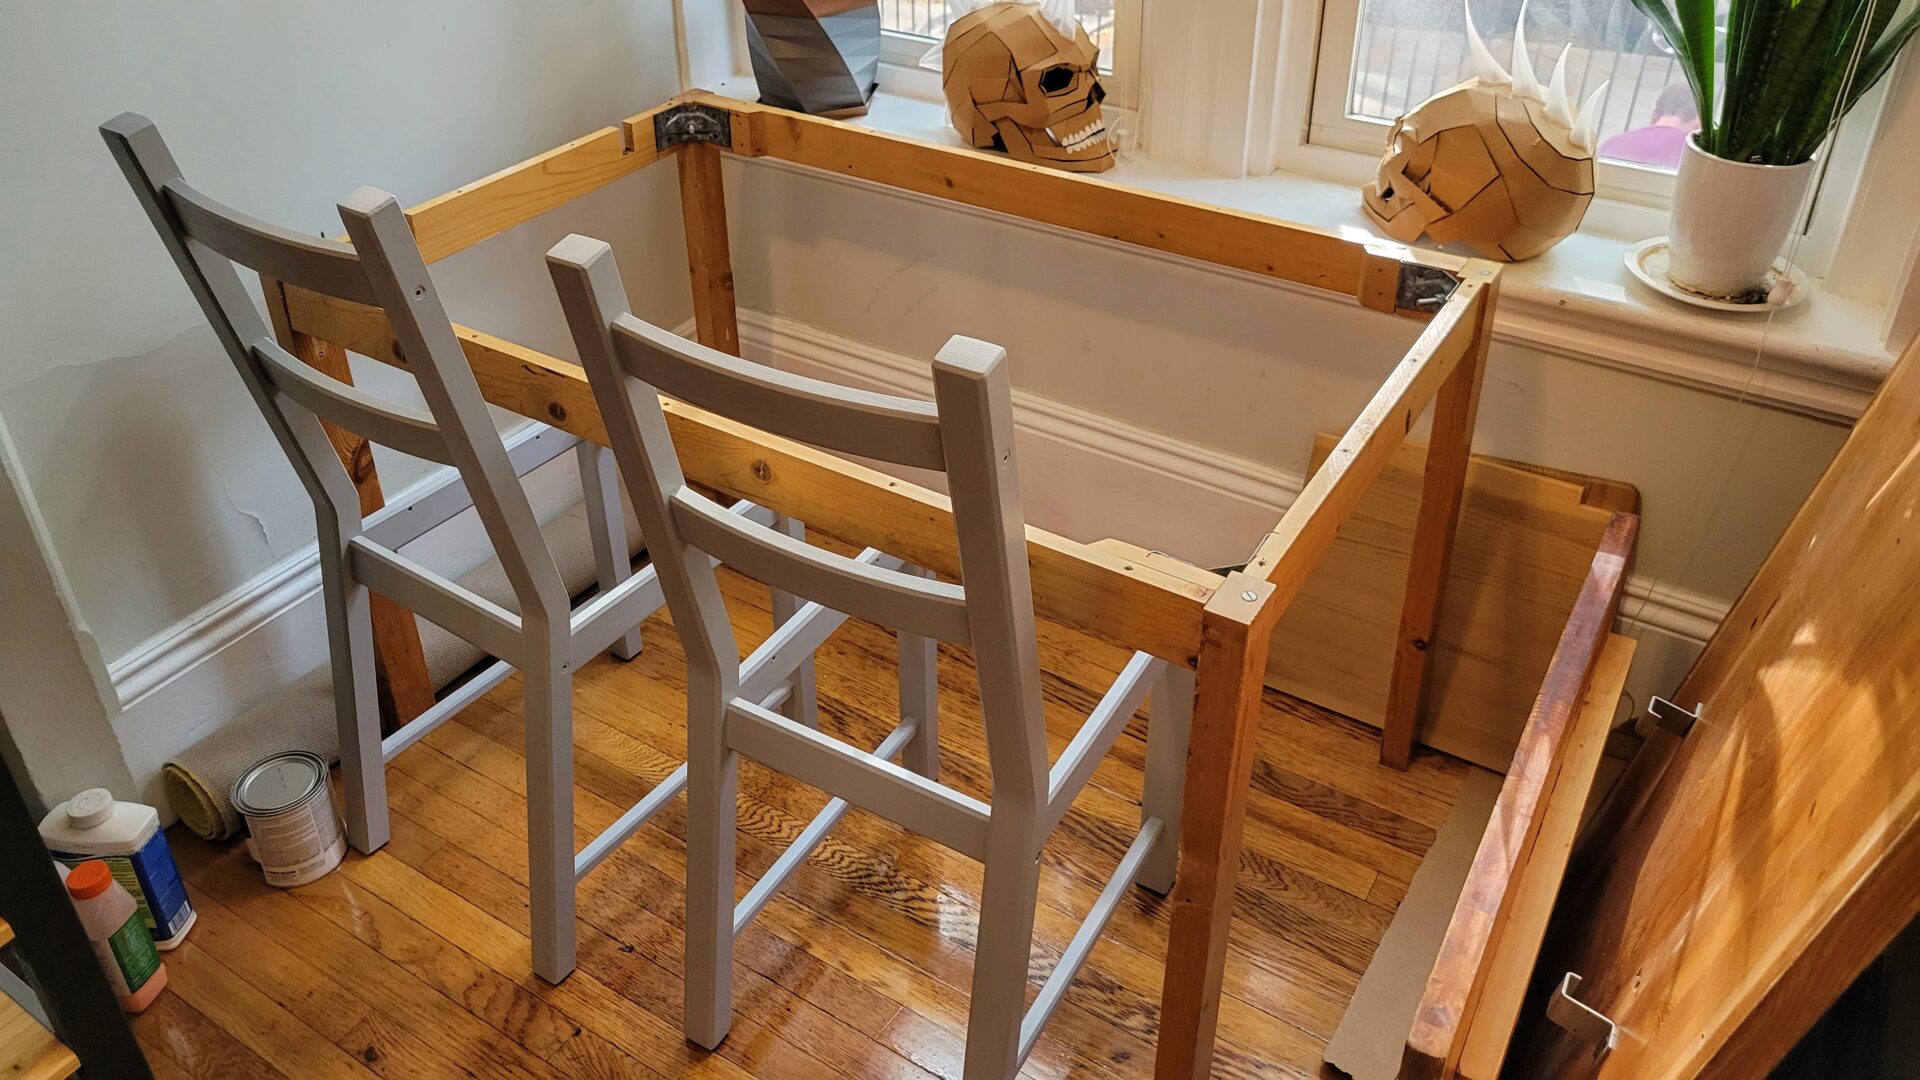
While we’re at it, the chairs also need some help. They’re Ikea Ivar chairs, which are plain pine chairs that you’re supposed to finish when you get them. And that was my roommate’s intent when he originally got them, but he never got around to it, so I inherited the unfinished chairs that are starting to accumulate a lot of grime.
So here’s the plan:
- Refinish the top of the table with polyurethane.
- Patch some whacked up spots in the table legs and paint them.
- Paint the chairs to match the table legs, and match the chair seats to the tabletop.
Bonus: once we start this project, we have incentive to work fast, because we have no table in the meantime. And we decided to start this when the weather was over 90°F.
Table top
My original plan was to take an orbital sander to this and just take everything off. But when I (smartly) decided to ask my dad for suggestions on this project, he said I should strip it first. Otherwise, the finish would just clog up the sandpaper.
Stripping
Of course, I didn’t think to ask what stripper my dad recommended. I went for Citristrip, because it looked like one of the less toxic options. Apparently, that means it doesn’t work as well, but since this is only a thin layer of some kind of varnish, I figured we could get away with it. My dad also suggested putting the stripper on with an old brush, since the stuff will mess it up. Of course, I have no paintbrushes at all, so I used the cheapest paint brush sold at Home Depot. It is truly a terrible brush that I have no shame in destroying, since it cost $1.68.
Google told me it’s important to put the stripper on thick enough that it doesn’t dry out while it’s working. One website said to put it on 1/8” thick. That seemed ridiculous, and I didn’t want to have to buy another quart of the stuff. So we tried to go for a happy medium of a gloopy, sloppy paint job.
Then you wait 30 minutes to 24 hours for it to work. We’re working against the deadline of a multiple days of rain later in the week, so we went closer to the 30 minute mark – probably 45-60 minutes.
Then, it’s time to scrape it off with a paint scraper. The internet said to use a plastic scraper to avoid scratching the wood. But we’re going to sand the crap out of this, so it doesn’t matter. Plus, we already have a humorously large metal scraper. It did the job, but in retrospect, a smaller one would have helped get more pressure to get all the finish off.
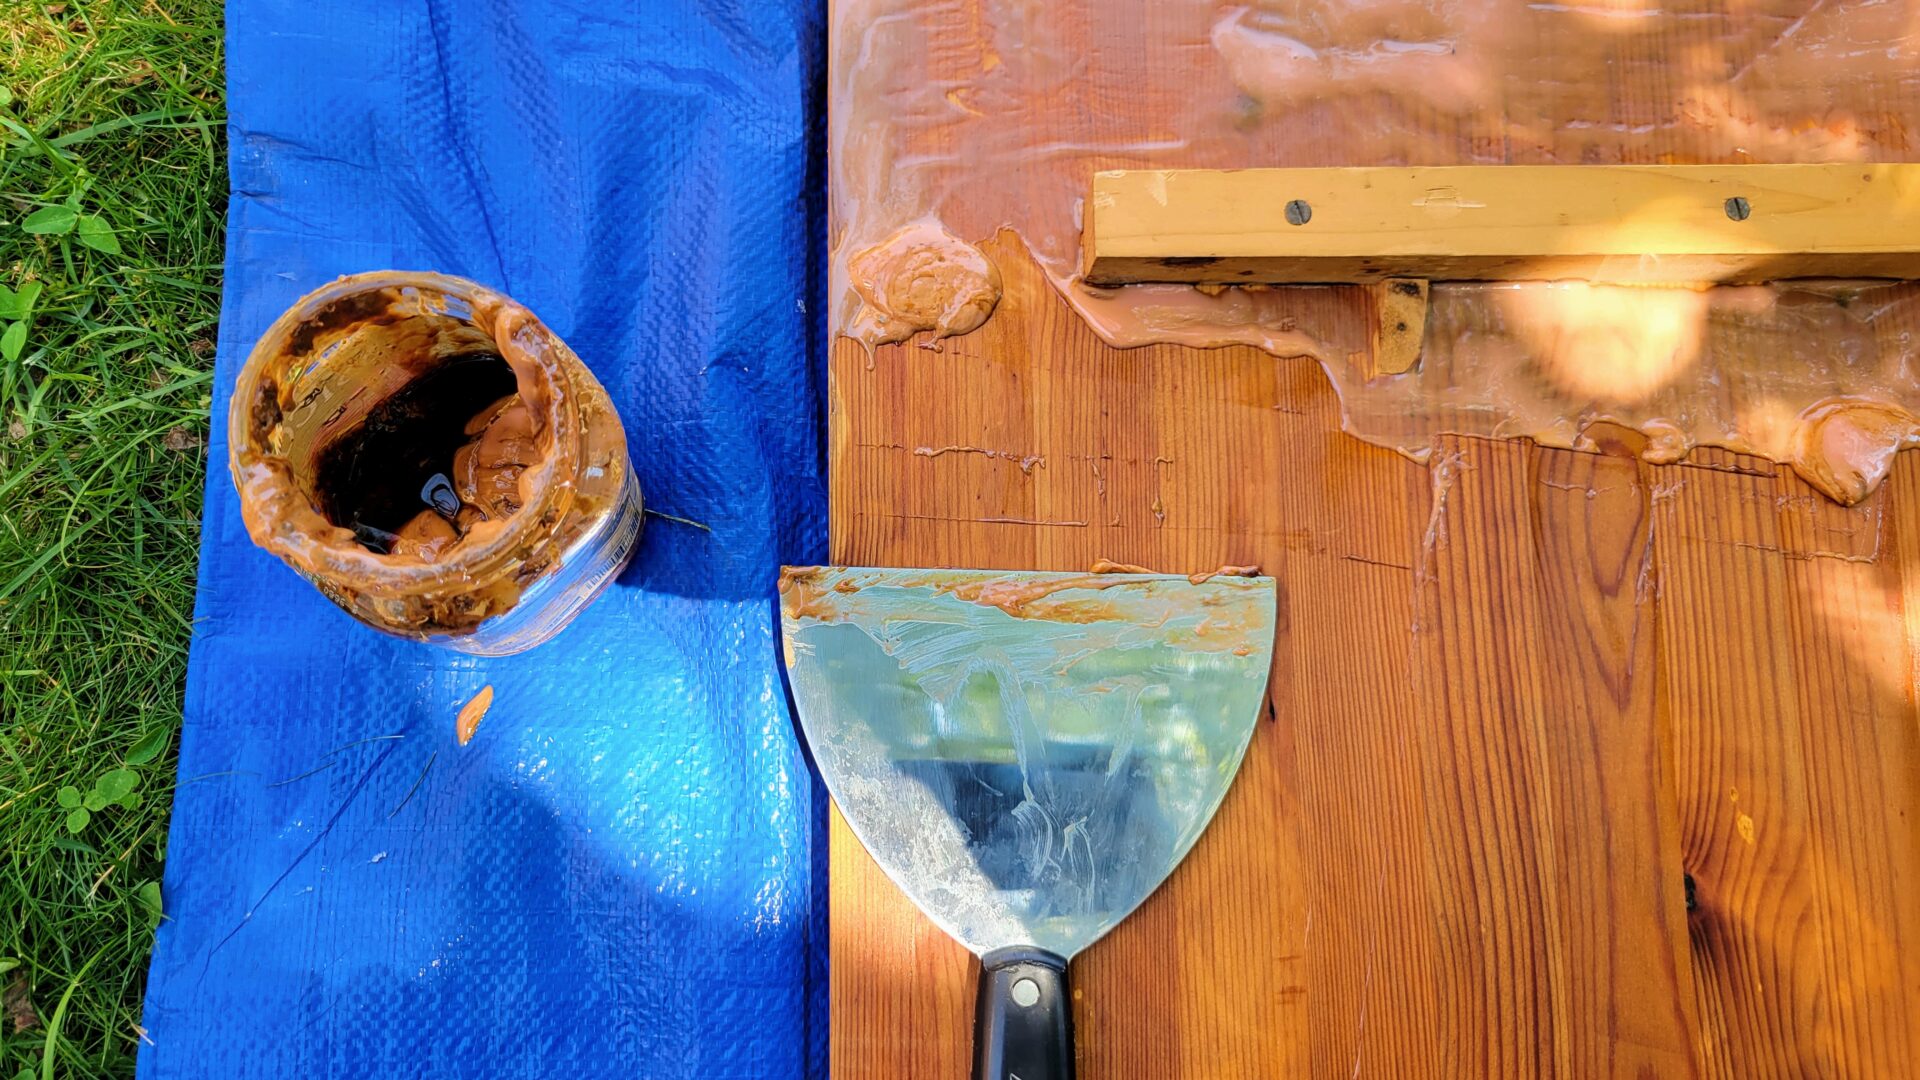
This is a truly gross and weirdly satisfying process. You can definitely tell that it was taking the finish off because of the dark brown liquid underneath when scraping it up. But the resulting mixture looks kind of like melted flesh. The challenge here was that we didn’t know if we’d actually gotten all of the finish off. Was the wood still dark because it’s now wet? Or is there still finish left? Or is there a stain in the wood underneath? To help deal with whatever it was that was left behind (including residual paint stripper), we wiped the whole thing down with a lot of mineral spirits. Clearly we didn’t get everything off with the stripper, because the rag was also getting dark with the stain. But still unclear how badly we did, probably thanks to our impatience with the stripper.
We had to wait in suspense, because it was time to bring everything inside for the night. (The joys of apartment living with no garage: We were doing all of this in the front yard, and have to haul it all back inside at the end of every day.) The result was a table setup that looks like a modern art statement piece about the incompleteness of modern life in a consumerist culture.
Sanding
When we pulled it out the next day, the results were mixed. Some spots were totally clear, and others had some residual finish, but not nearly as bad as much as there was before. It seemed good enough that we could start sanding, rather than doing a second round of stripper.
We’d tried to get an orbital sander at Home Depot, but they didn’t have any cheaper than $60 in stock. So instead, we bought one of the cheapest sanders on Amazon with next-day delivery (along with a 100-sheet variety pack of sandpaper for it). It’s not an industrial grade power tool, but it has 4.7 stars and should be good enough for noobs like us.
We started with the most course sandpaper in the pack: 60 grit. We got through the leaf before it gummed up with remaining finish. Oops. But it would have been way worse if I hadn’t listened to my dad’s advice about stripping it.
After a couple sheets of 60 grit got off all the finish and evened things out, we switched up to 80 grit. I don’t know what the right way to do this is, but we took turns putting much of our body weight into the table surface to get off as much material as we could (while the other person held onto the tabletop to make sure it didn’t flip over).
It didn’t take long before it got difficult to sand the leaf with it still attached to the table – particularly on the end where it was hinge-attached to the rest of the top. (This appeared to have had years of drips down it, so it definitely neeeded the cleanup). We unscrewed the hinges, which we realized looked way undersized for their purpose; some of the screws were starting to rip out of the top. So I guess we’re replacing the hinges, too!
The 80 grit sandpaper worked to get out the big damage, like all the knife marks on the leaf. From there, we kept working our way up: first to 120, then finally 240 grit. By this point, it felt smooth enough. We’re going to put multiple layers of polyurethane over this anyway, so going any smoother feels like a waste.
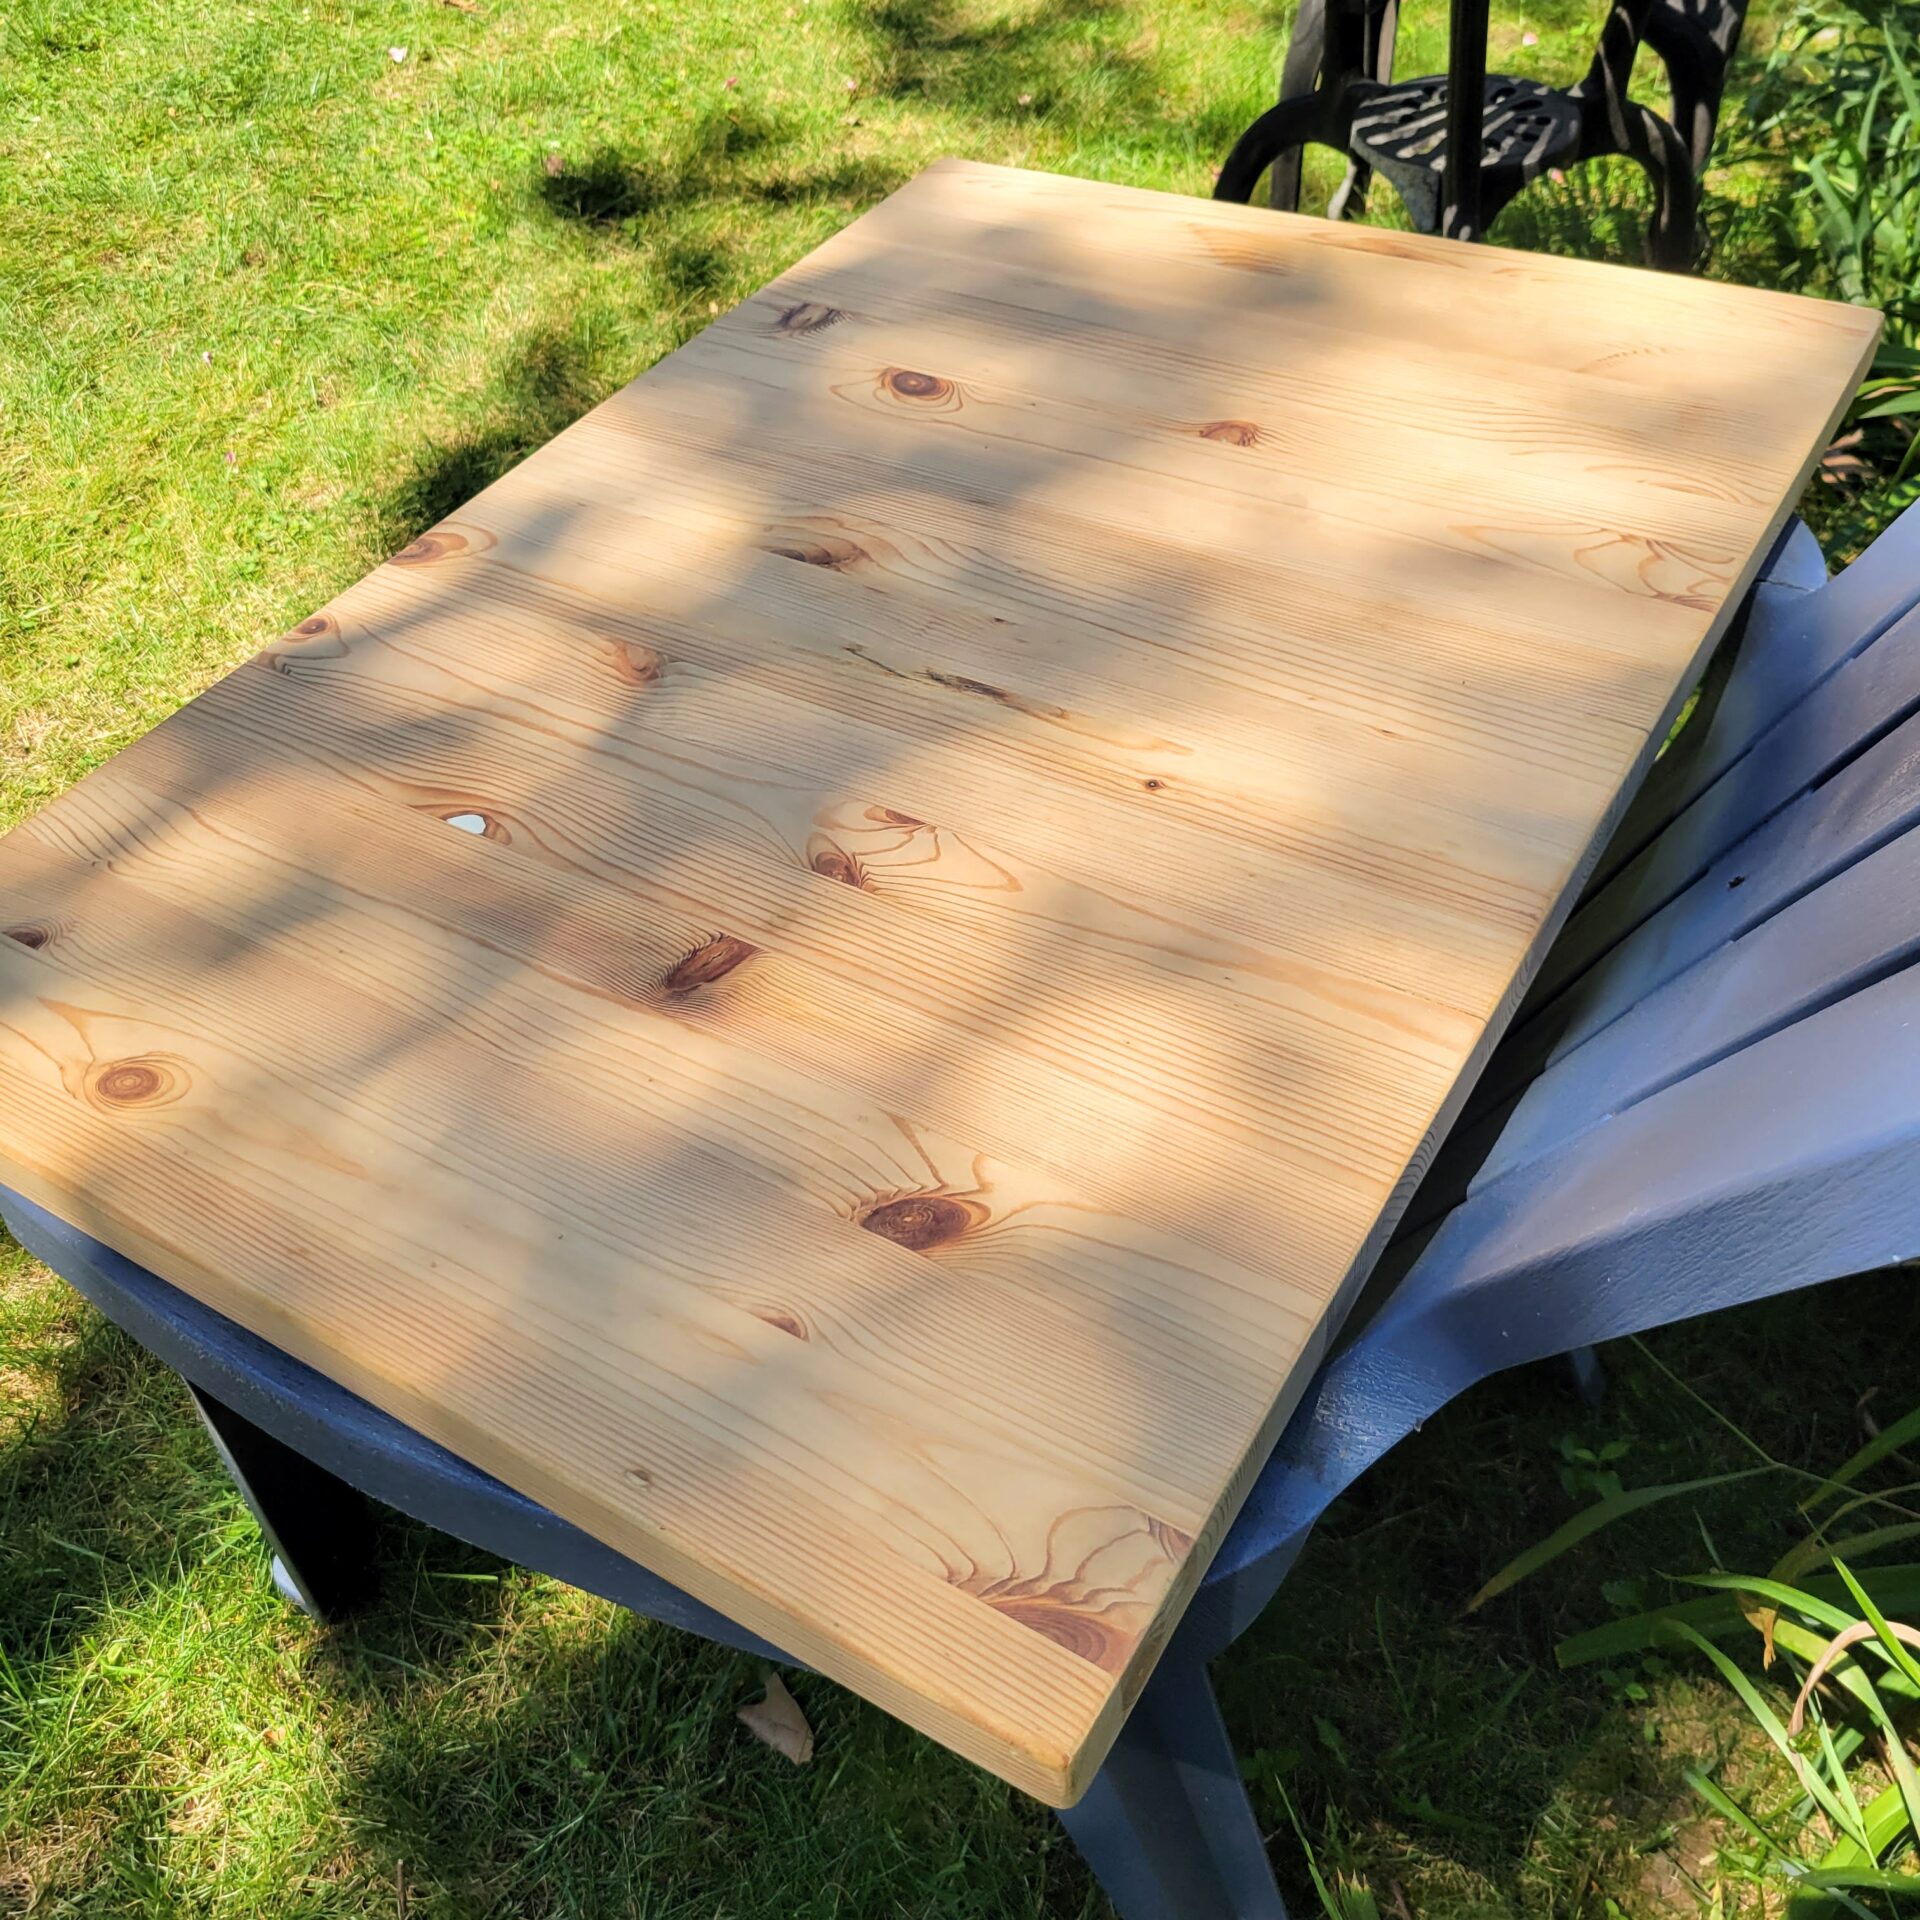
And dang, that looks so nice! Especially when comparing it to the picture of where this started. Feels worth spending the entire Monday evening in 90+ heat for that.
Finishing
Out of the entire process, this is the step that I feel most confident about, since I finished my desk the same way – with wipe-on polyurethane. (In that case, it came as unfinished wood, so I didn’t have to worry about the rest of these preceding steps.) That hardly makes me an expert, but at least I’d done most of the googling for it a couple of years ago.
We decided not to stain the tabletop because it’s pine, and pine doesn’t take stain well. Googling told me that the best way to stain pine is at least a five-step process. For that many steps, I’m very happy with my naturally-colored tabletop. (I mean, I’m a fan of the light wood anyways.)
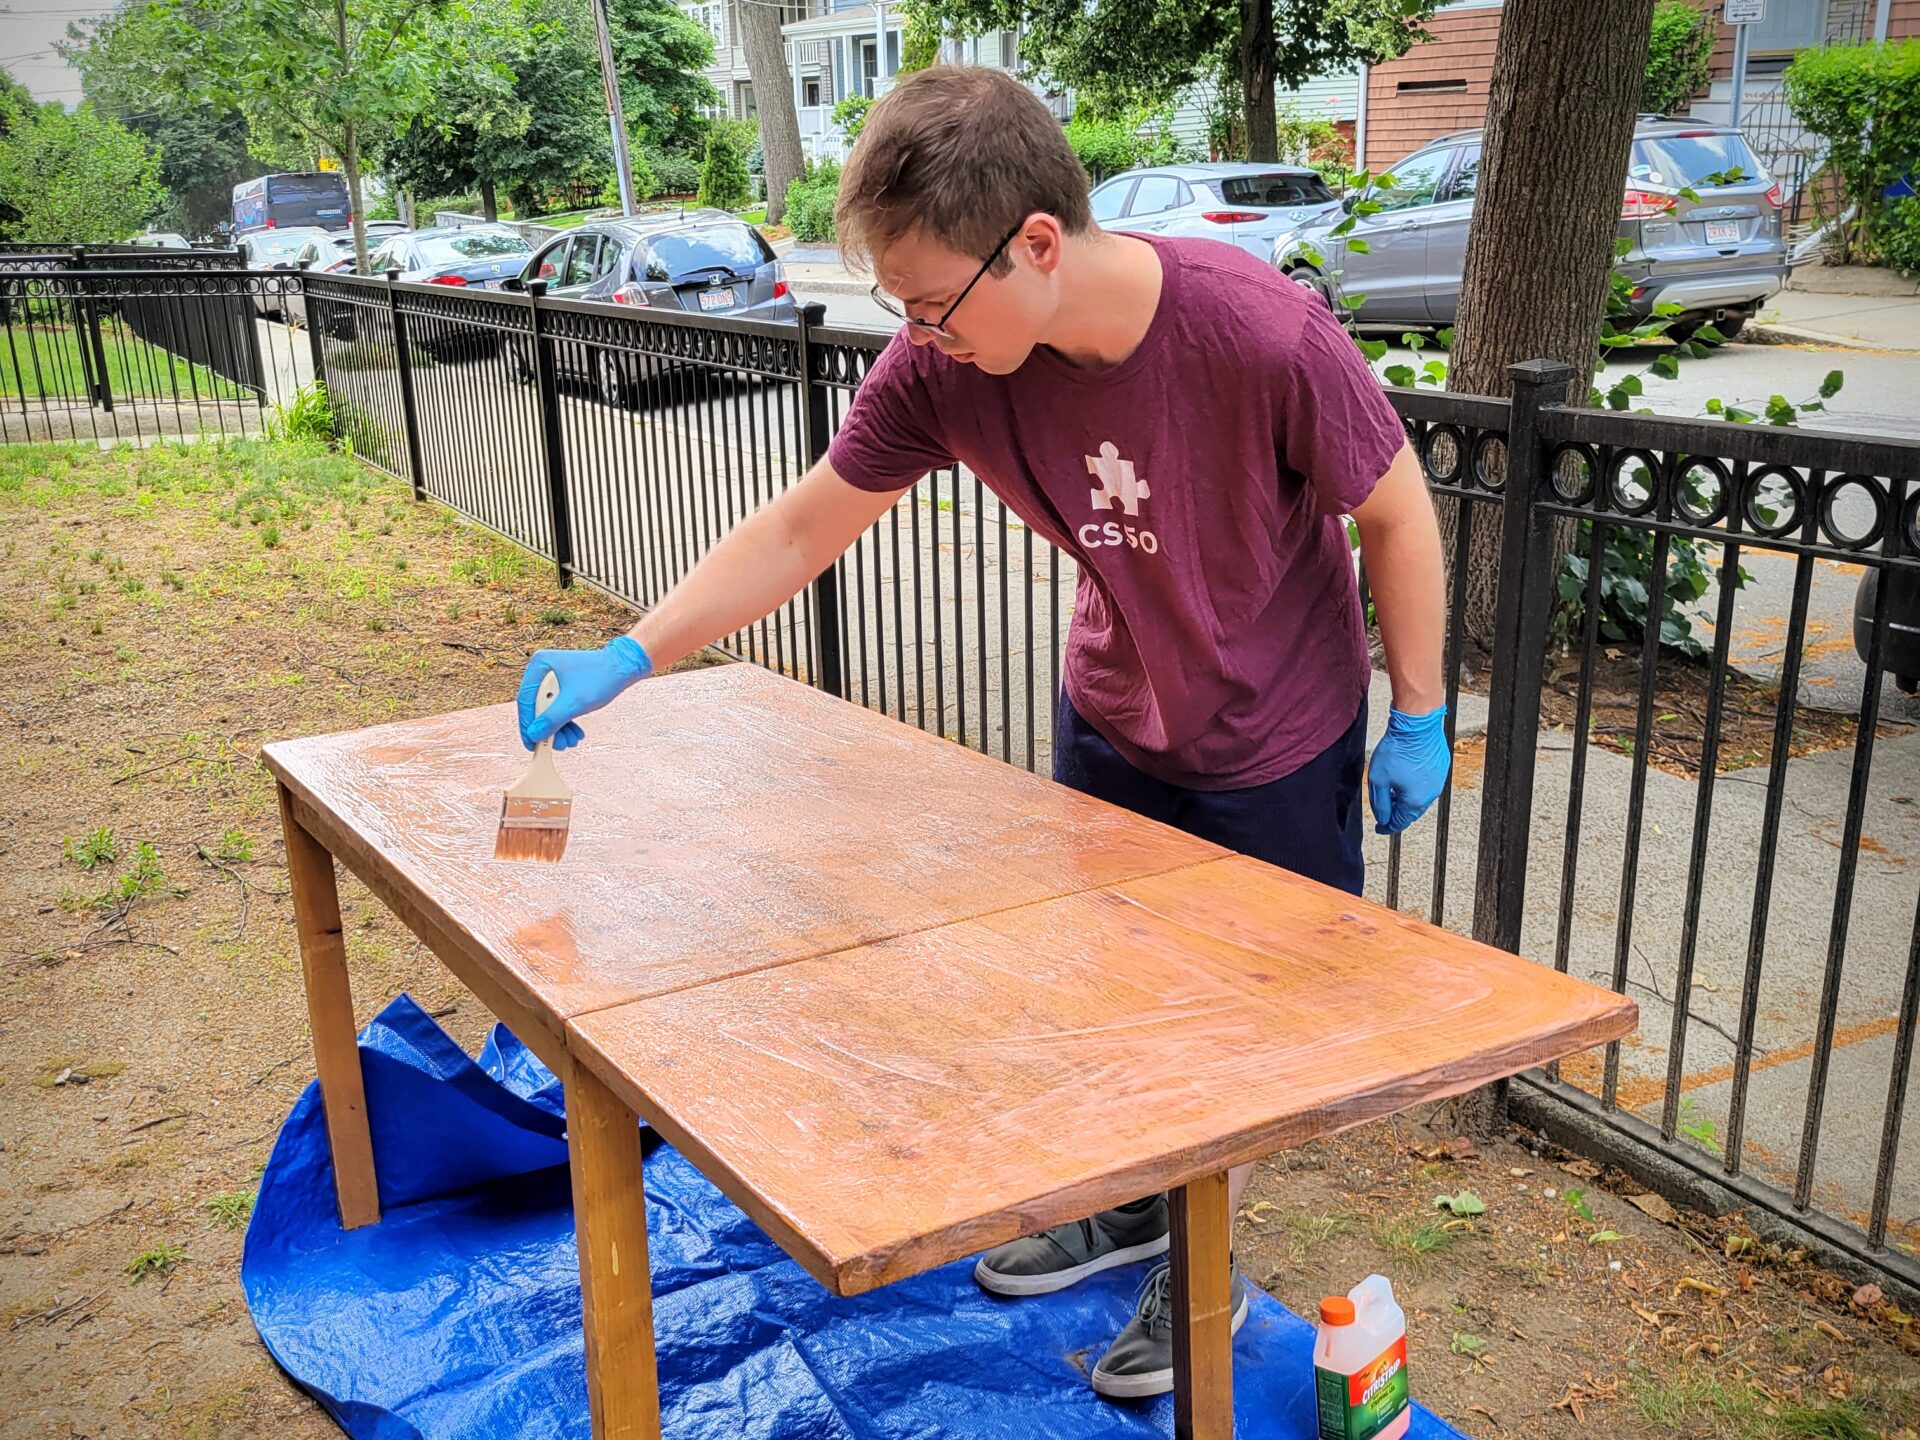
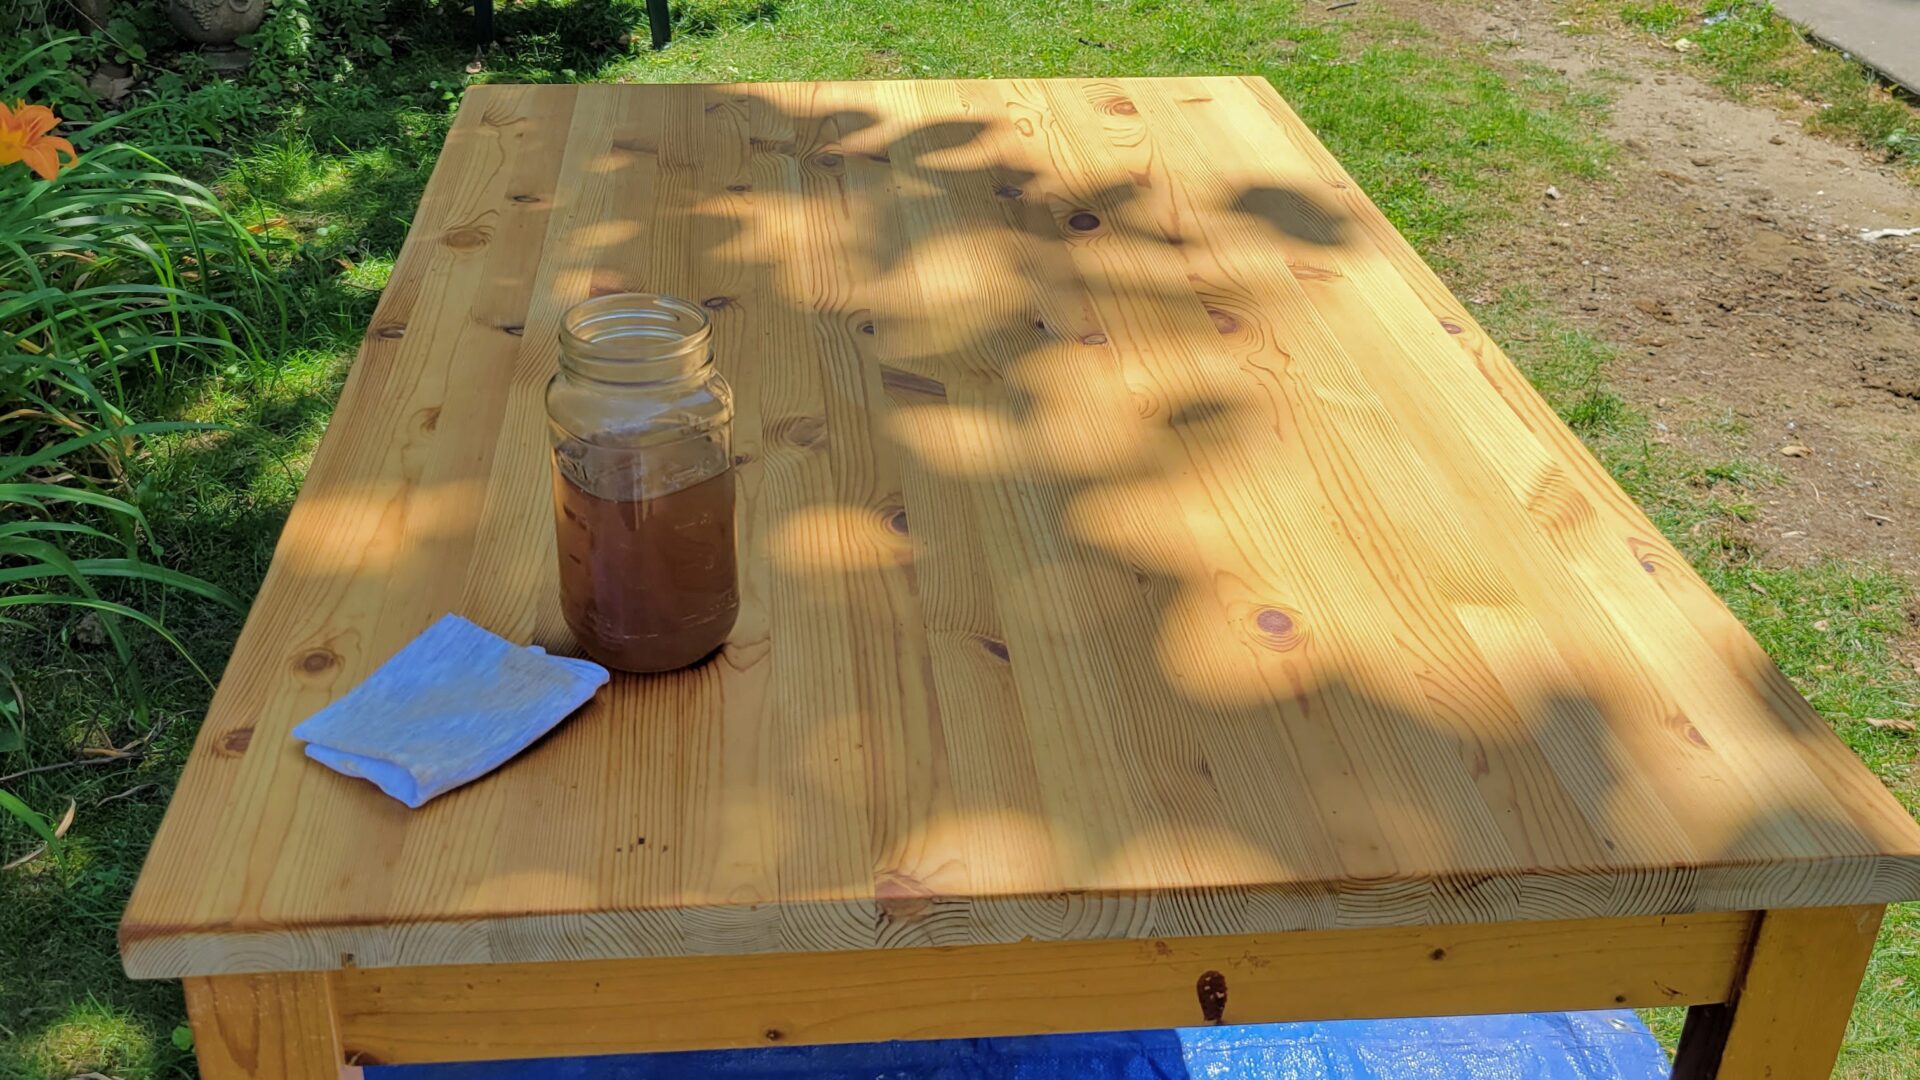
So that means we can go straight to the clear coating of wipe-on polyurethane. The reason for wipe-on poly is the same as when I chose it for my desktop. It’s a durable finish that’s water resistant (great for a table!) It’s also a lot more forgiving to apply than polyacrylic. Using wipe-on poly (as opposed to brush-on poly) is also easier for big flat surfaces, because you don’t have to worry about brush marks. The flip side is that a wipe-on coat applies a lot less of the finish, so you need 2-3 times as many coats. And whereas polyacrylic is fully clear, polyurethane is slightly yellow/warmer, especially for oil-based polyurethane.
They actually sell wipe-on polyurethane, but everything I saw online said it’s not worth buying, because it’s just a 50/50 mix of regular (brush-on) polyurethane and mineral spirits… which cost a lot less to buy. You can also only do this with oil-based polyurethane, since mineral spirits won’t mix with the water-based stuff. So the finish will be a little yellower. The problem is that I started by buying the wrong kind of mineral spirits. I didn’t realized that there were different kinds of mineral spirits, but apparently Home Depot sells a “green” option that is in fact a mineral spirit subsitute, and not clearly labeled as such. So it’s actually a milky white substance (instead of being completely clear), and it doesn’t actually work for making wipe-on polyurethane. Time for another trip to Home Depot!
I felt pretty confident about applying wipe-on polyurethane, since I’ve done it before and it’s relatively hard to mess up. (In the worst case, you can always sand it down.) But on the first round of application, I forgot that I should wear gloves. My hands were so sticky with the stuff. And since it’s oil based, it won’t come off with water. Soap and water helped some, and so did wiping my hands down with mineral spirits, but they’re still sticky in spots hours later. At least I won’t be making that mistake again.
A quick side note here: a lot of guides suggest using glossy polyurethane for all but the last coat. Then, to get a satin finish (which is what I’m going for here), just use satin polyurethane on the last coat. This is because the satin poly is made with an additive to the glossy variant, and using it for many layers will dull the look of the finish. But I’m not buying a whole separate can of polyurethane for that! And besides, this isn’t exactly fine woodworking. I’m using satin all the way down.
The rest of the finishing was a bit tricky just because of the number of coats we needed to do. I’m not exactly sure how many coats are actually required, but the internet seemed to suggest three coats of brush-on polyurethane, or maybe 10 coats of wipe-on. We were also in sub-optimal conditions, with a heat wave going on. This isn’t great for polyurethane. Nor is trying to brush on a smooth, even coat when it’s getting dark and you’re trying to work by the light coming out of the window.
That means there are a few inconsistencies in the finish if the light hits it right. But we’re probably the only ones who will notice it, especially once you throw placements on top.
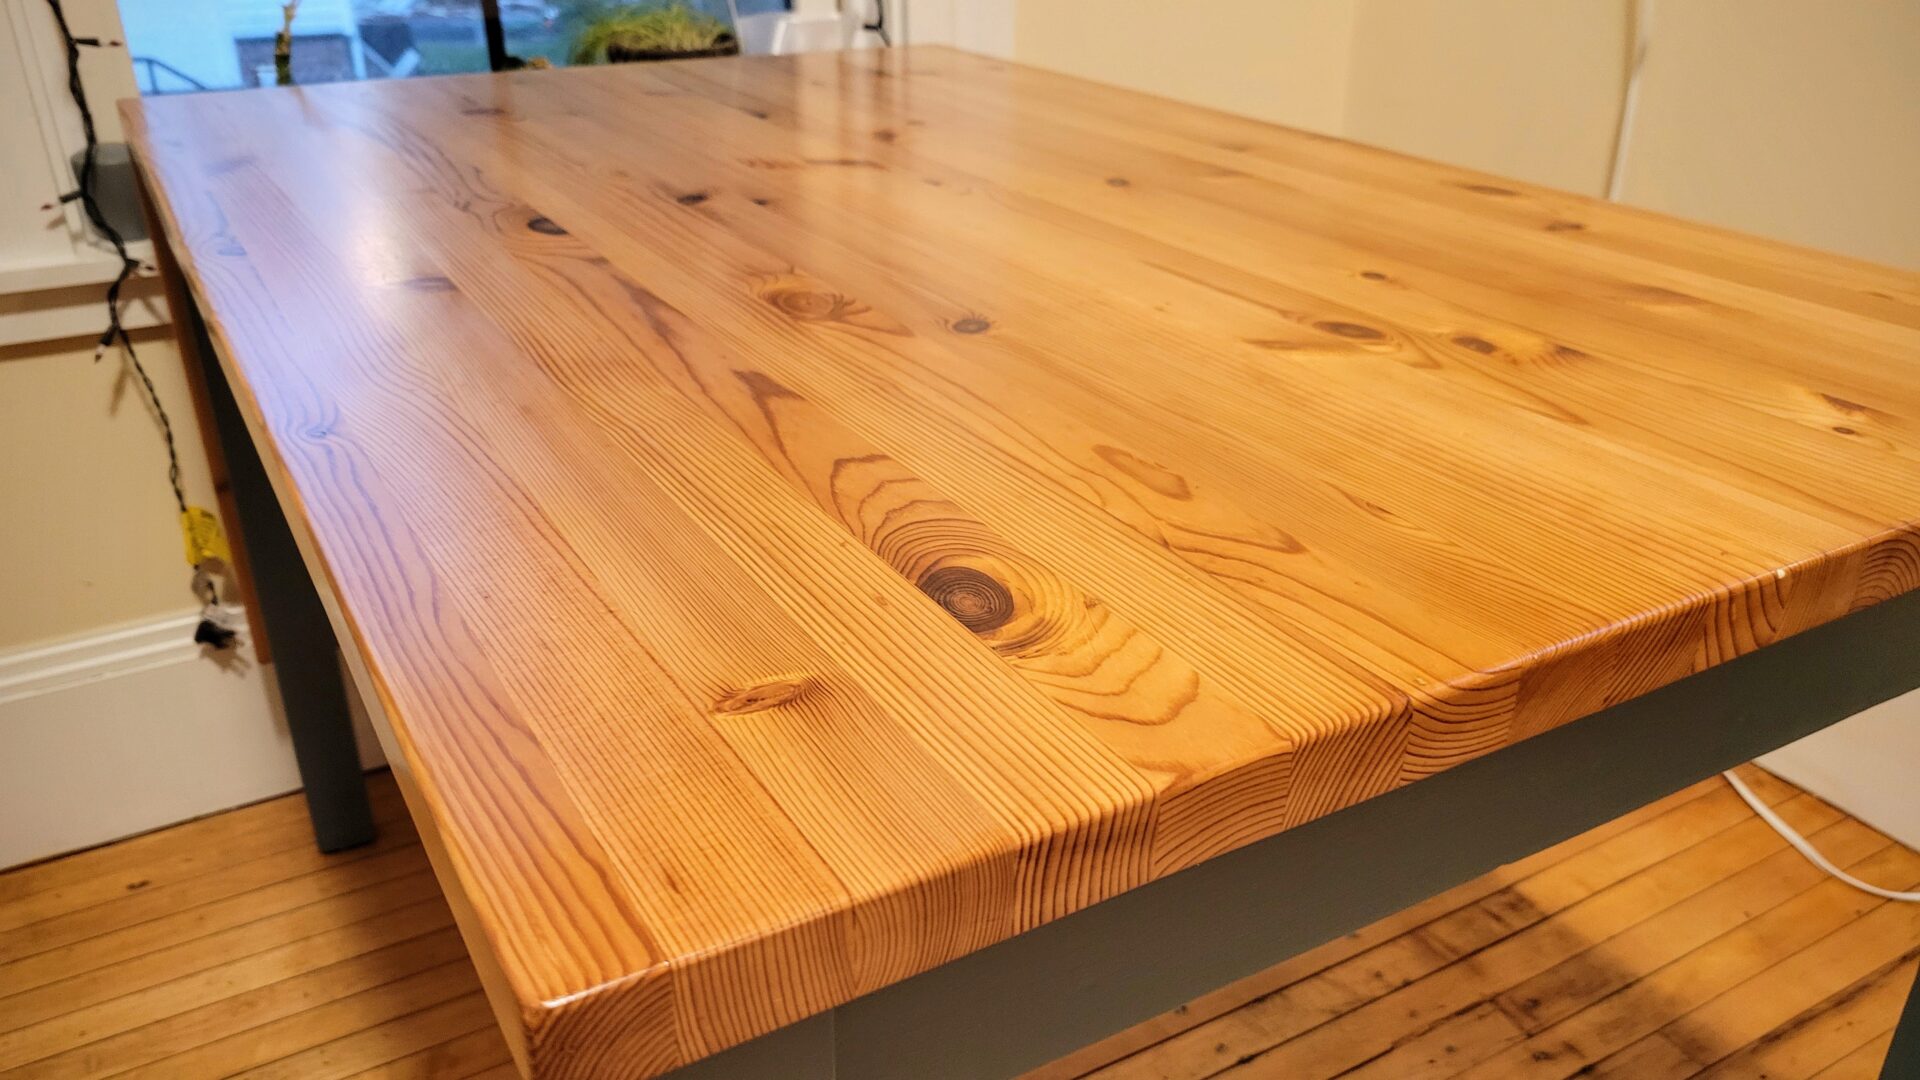
I’m not above a glamor shot of a tabletop.
Chairs
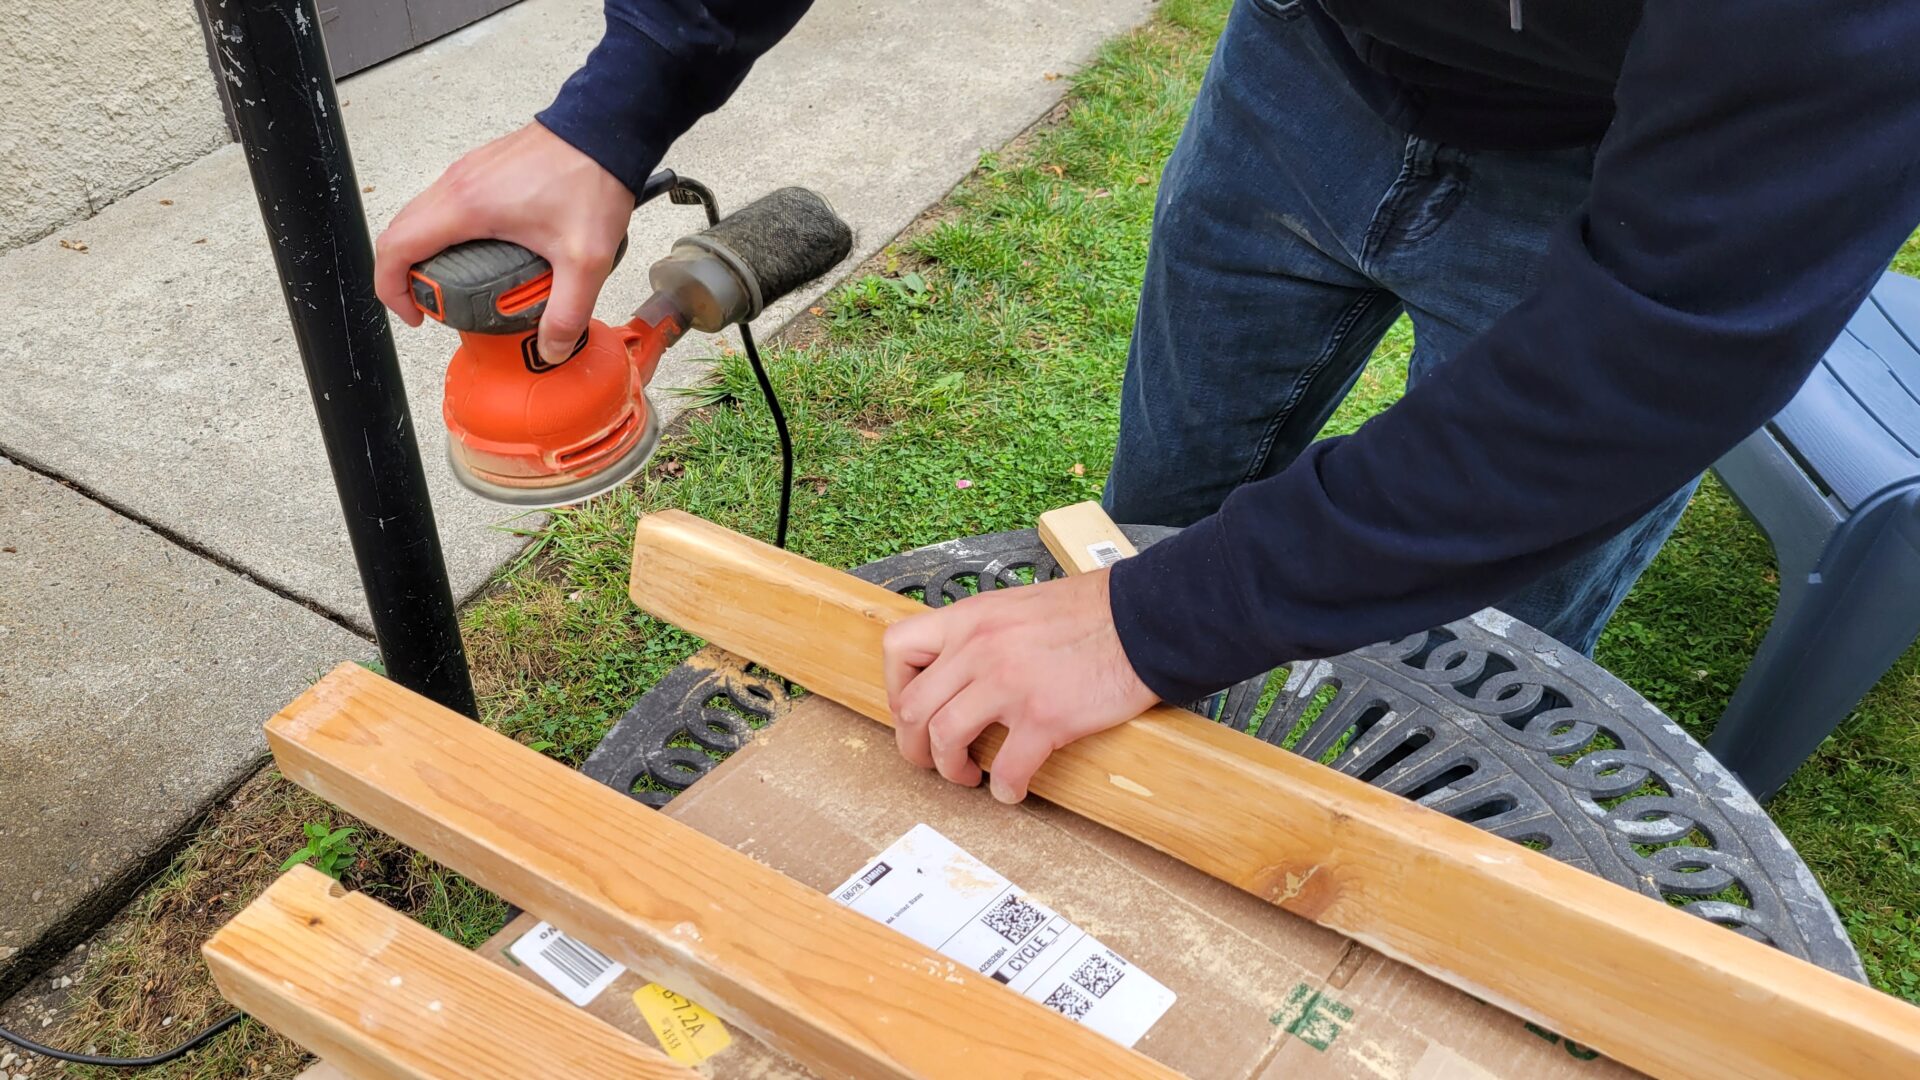
The saving grace for the chairs is that they were never finished, so we didn’t have to strip anything off of them. They had, however, gotten kind of gross looking from years of use unfinished. Instead of completely disassembling the chairs and taking the disc sander to every piece, we stuck with light hand sanding to get rid of the grimy layer and provide a better surface for the primer to stick to. We just took the disc sander to the seats, since they’re going to be finished with polyurethane as well.
In the absence of any real knowledge of painting furniture, I got Rustoleum Painter’s Touch flat gray primer. I read somewhere that you should use gray primer when you’re painting over it with darker colors.
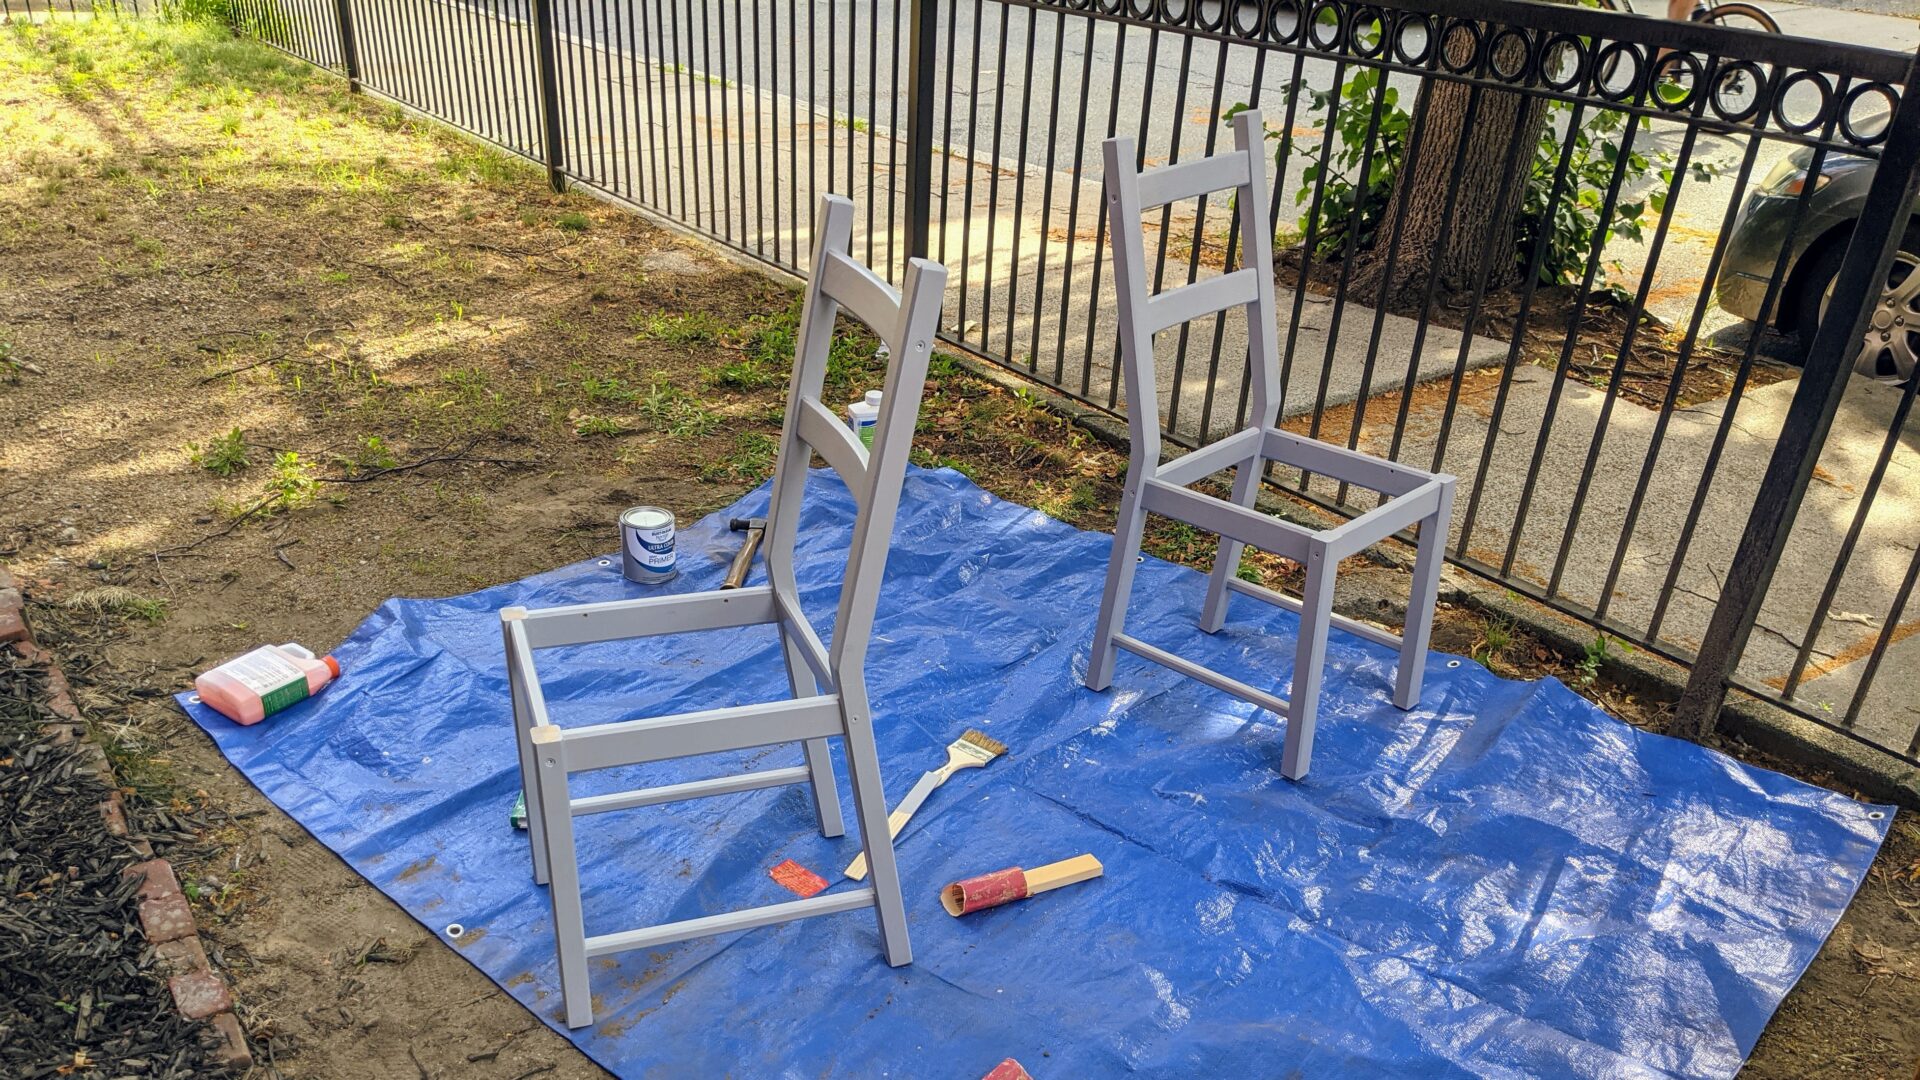
Side note: refinishing furniture in your yard is a nice way to meet your new neighbors.
There’s a lot of stuff online (often but not exclusively Pinterest-type blogs) that describe the right way to paint furniture, and this often involves some kind of top coat over the paint. And some woodworking blogs say that they’d never use latex paint on furniture in the first place. Overwhelmed by these strong opinions of unclear provenance or validity. So I asked my dad. He thought it was odd to use anything but latex paint on furniture, and wasn’t even sure what people meant for a top coat. (“Isn’t the point of the paint to be a top coat?” he asked.) Since his proposal was by far the simplest, that’s what we went with.
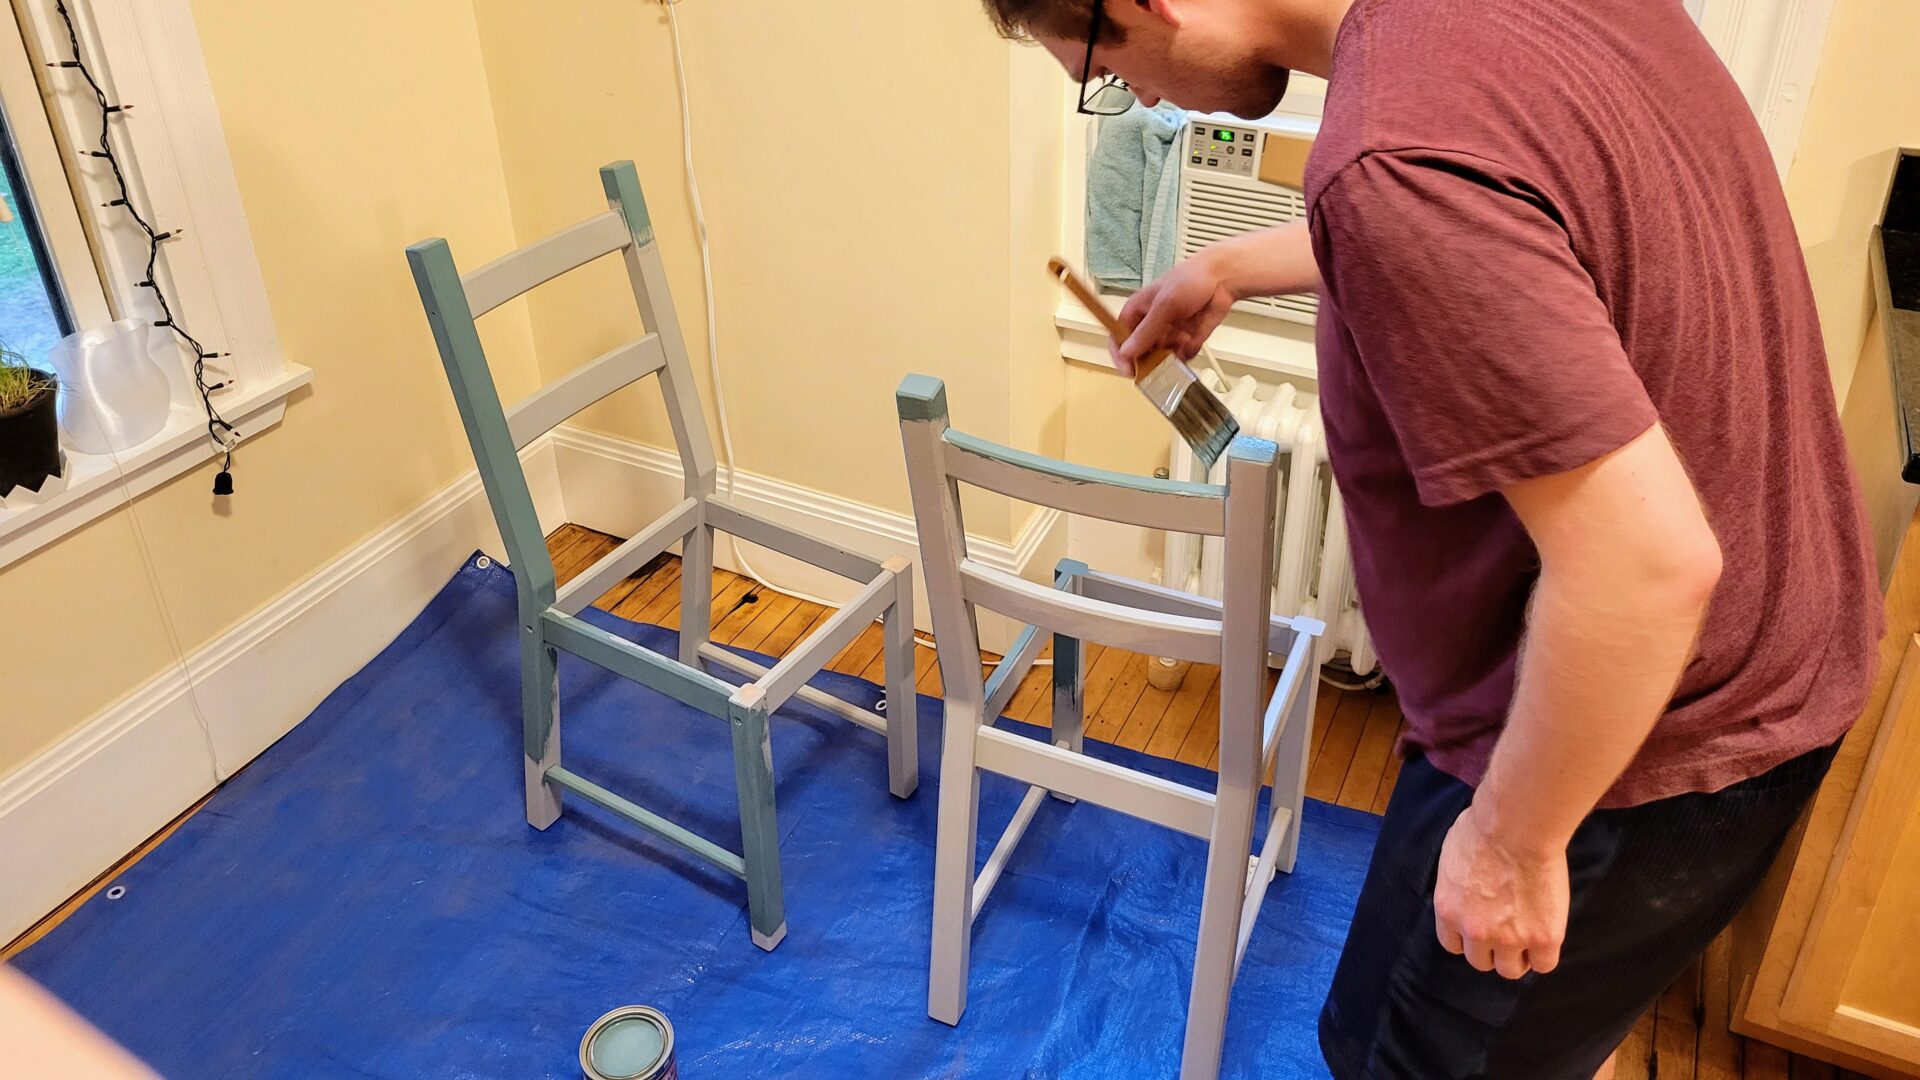
So next up was two coats of paint on all of the chairs, which we could thankfully do inside, unlike the sanding and the polyurethane. We had a lot of fun picking out the paint color at Home Depot. In classic form, we were worried that it would be too dull of a teal and too light but then once we got it home and started painting with it, we were glad it wasn’t any more saturated or darker.
We were a little bit smart about this, at least. We started by only painting two of the chairs at once, so that we’d have somewhere to sit before we got through everything.
The real problem here (and for the legs) was the stickiness. It was probably the heat and humidity, but it felt like the paint stayed somewhat sticky between coats, and even for weeks afterwards. For awhile, I was worried we’d royally screwed up somewhere and would be cursed forever with sticky chairs and table legs. Luckily, that faded, with the only lasting impact being one dinged spot in the chair paint before it was fully cured/hardened. (One of these years, I’ll pull the paint can back and fix that. Maybe.) However, we did intend to follow the online advice of lightly sanding with 220 grit sandpaper between coats. Unsurprisingly, that doesn’t work when your paint is still tacky. So our brush strokes might be more obvious if you look closely, but I think it’s not too bad.
Table legs
The table legs were kind of chewed up, probably from years of chair seats banging into the soft pine every time some pushed their chair in. It’s bad enough that paint isn’t going to hide it.
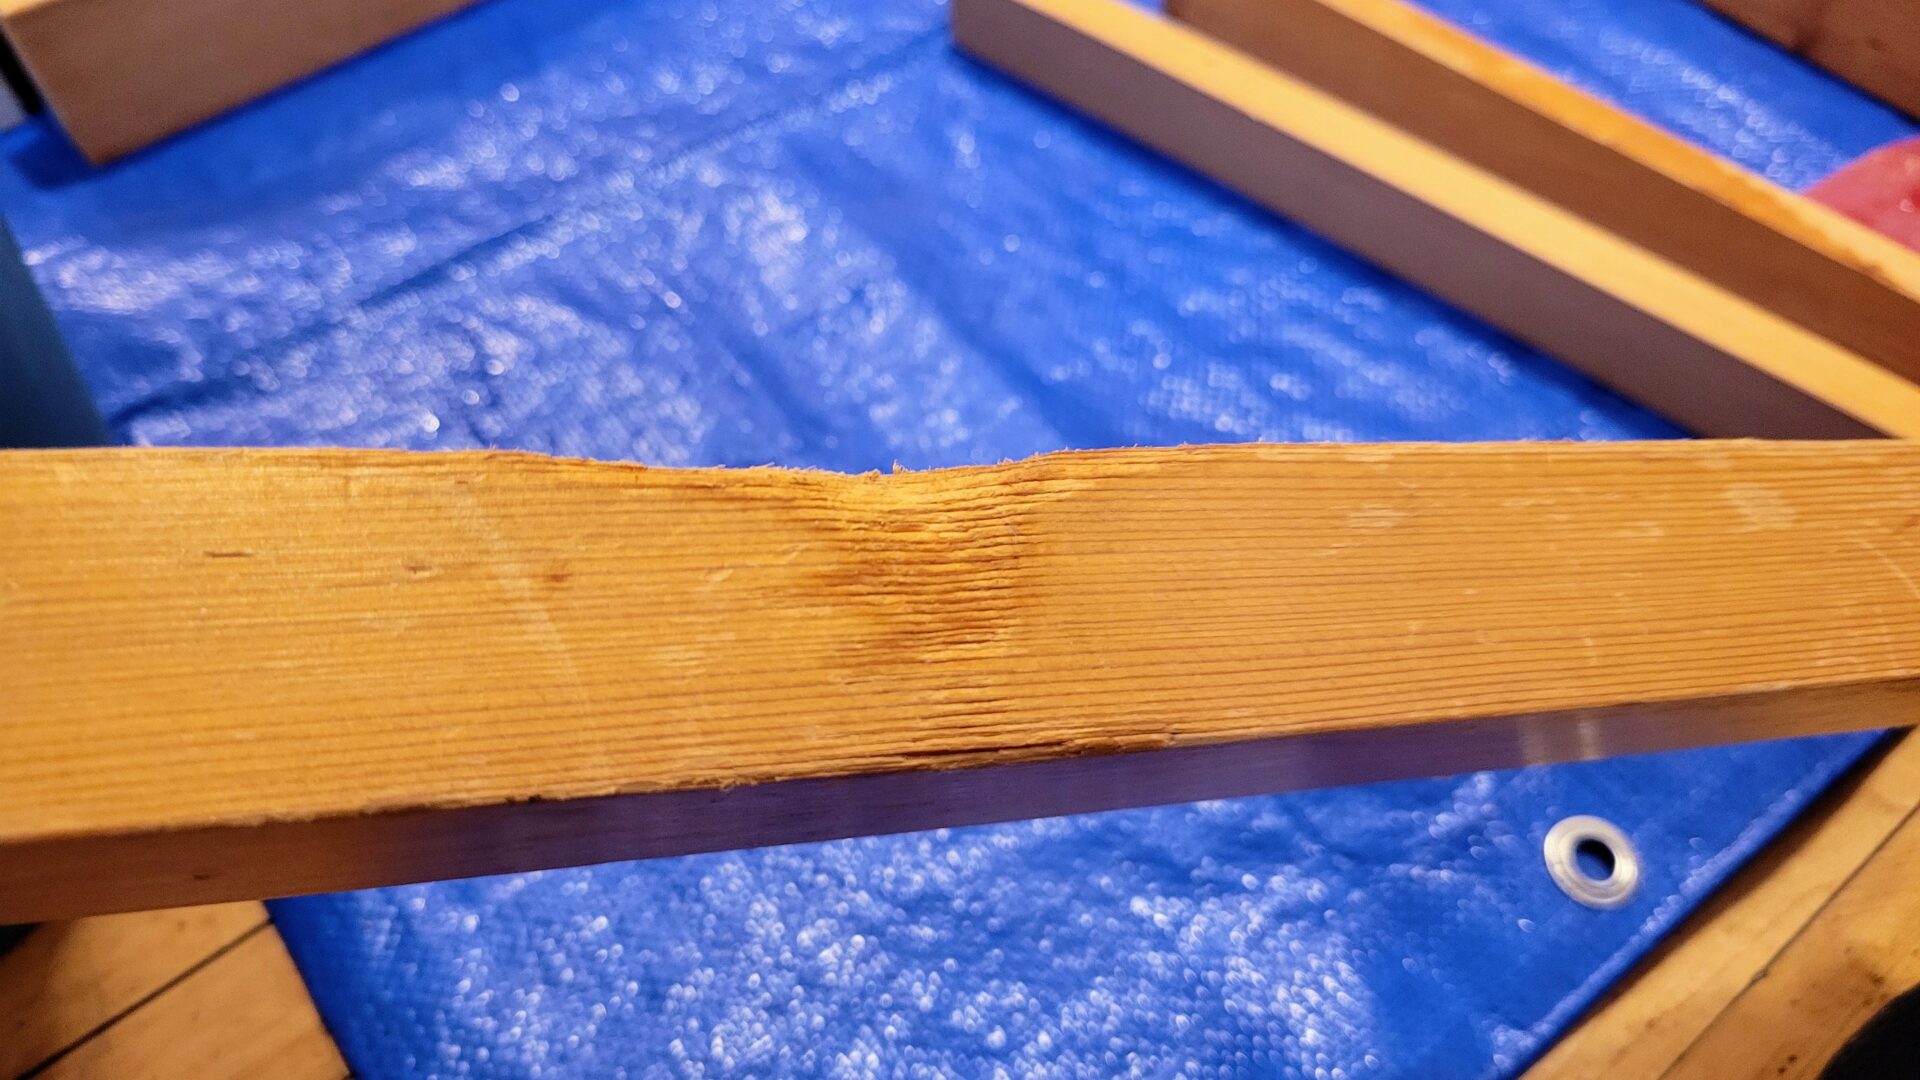
So we just filled it in as much as we could with wood filler. As I understand it, wood filler is even less strong than the wood it’s replacing. So I have no idea how well this is going to hold up. But I just kept glopping it on in rounds, trying to smooth it out, and then sanding it flattish once it dried.
We had a similar problem with the base of the legs being chewed up, but we decided to skip the wood filler and just sand down the legs to make them look semi-intentionally rounded. People aren’t focusing on the bottom of the painted legs, so I think we can get away with this.
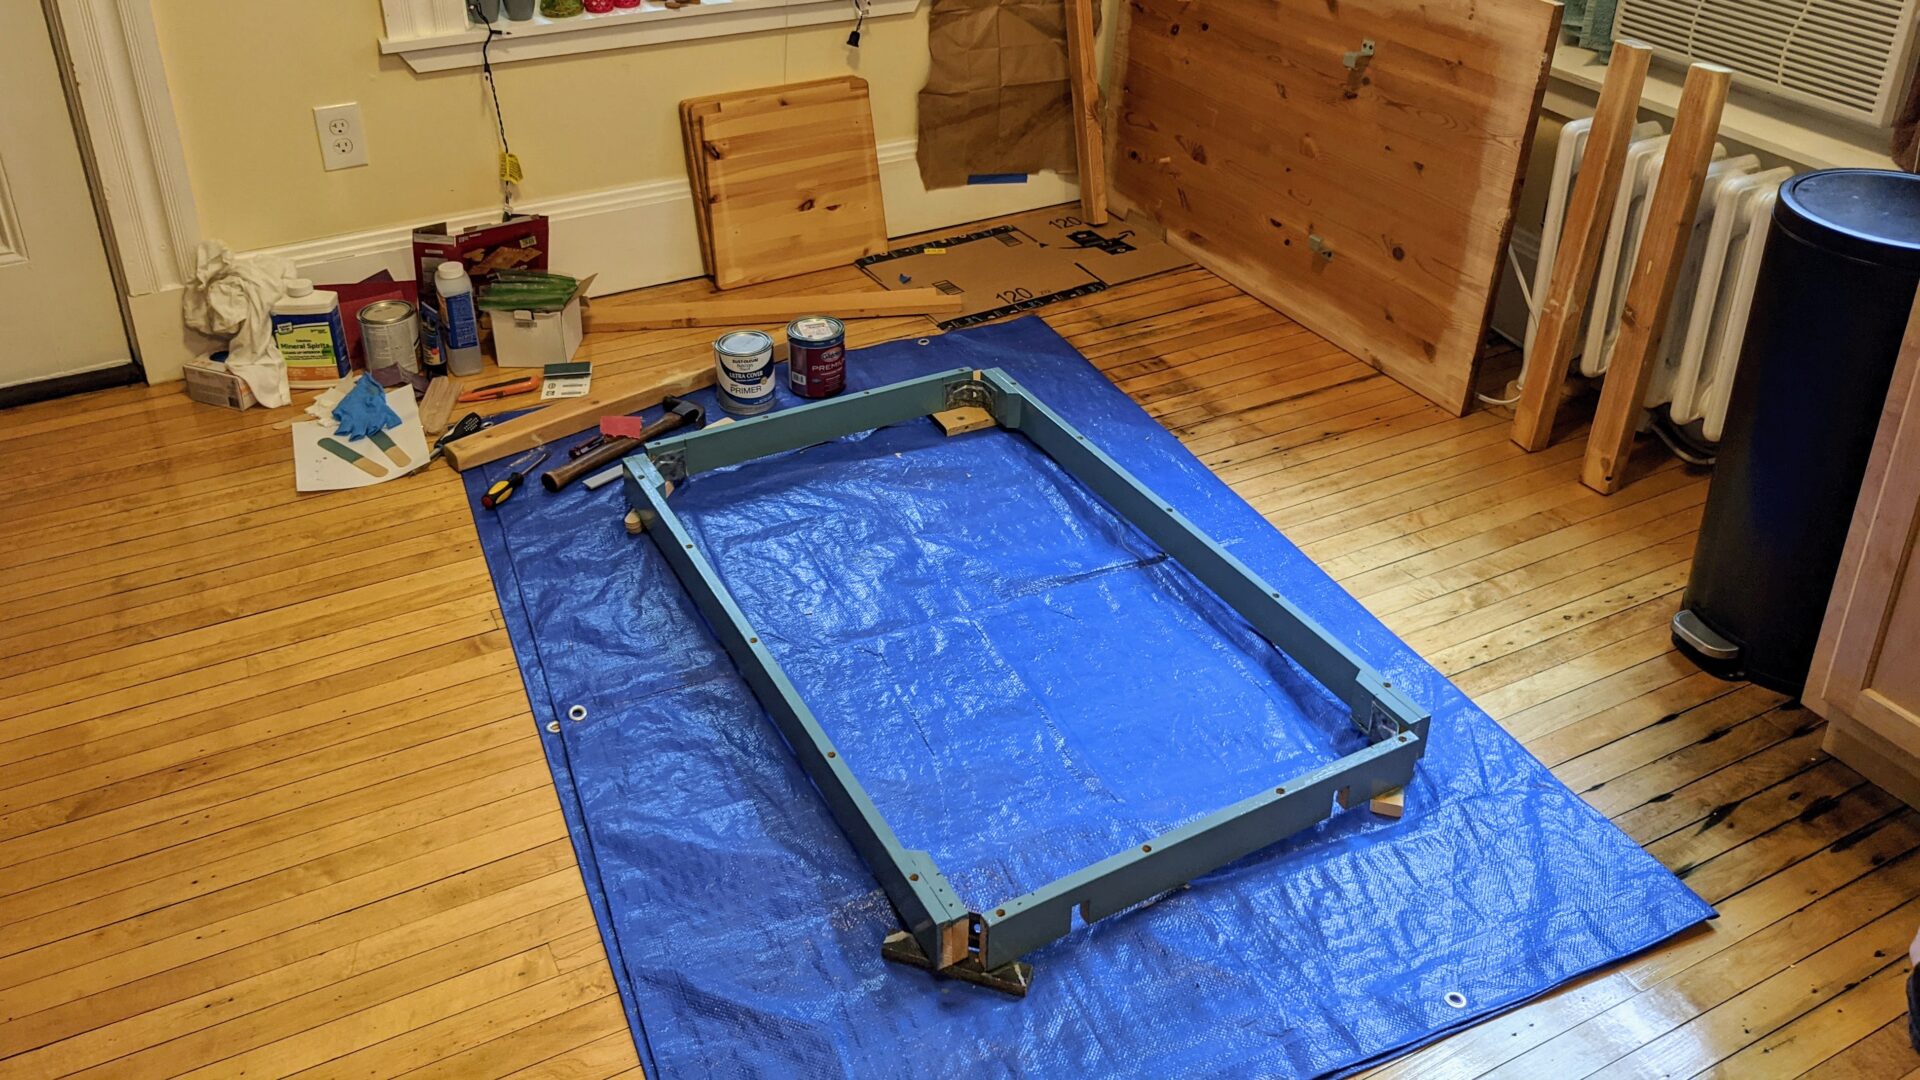
I bet you can guess what comes next: a round of primer and two coats of paint, all done crouched on the kitchen floor because we don’t have a sawhorse or a workshop.
Putting it all together
Because we wanted to make our lives just a little bit more challenging before we were done with this project, we decided to replace all of the hardware on the table. This wasn’t totally without reason. We’d noticed that over time, the table got wobbly pretty quickly. That’s because the screws holding the corner brackets in didn’t hold in very well. Plus, they were flathead screws with a very thin slot, which made them hard to adjust. Time to get some new screws.
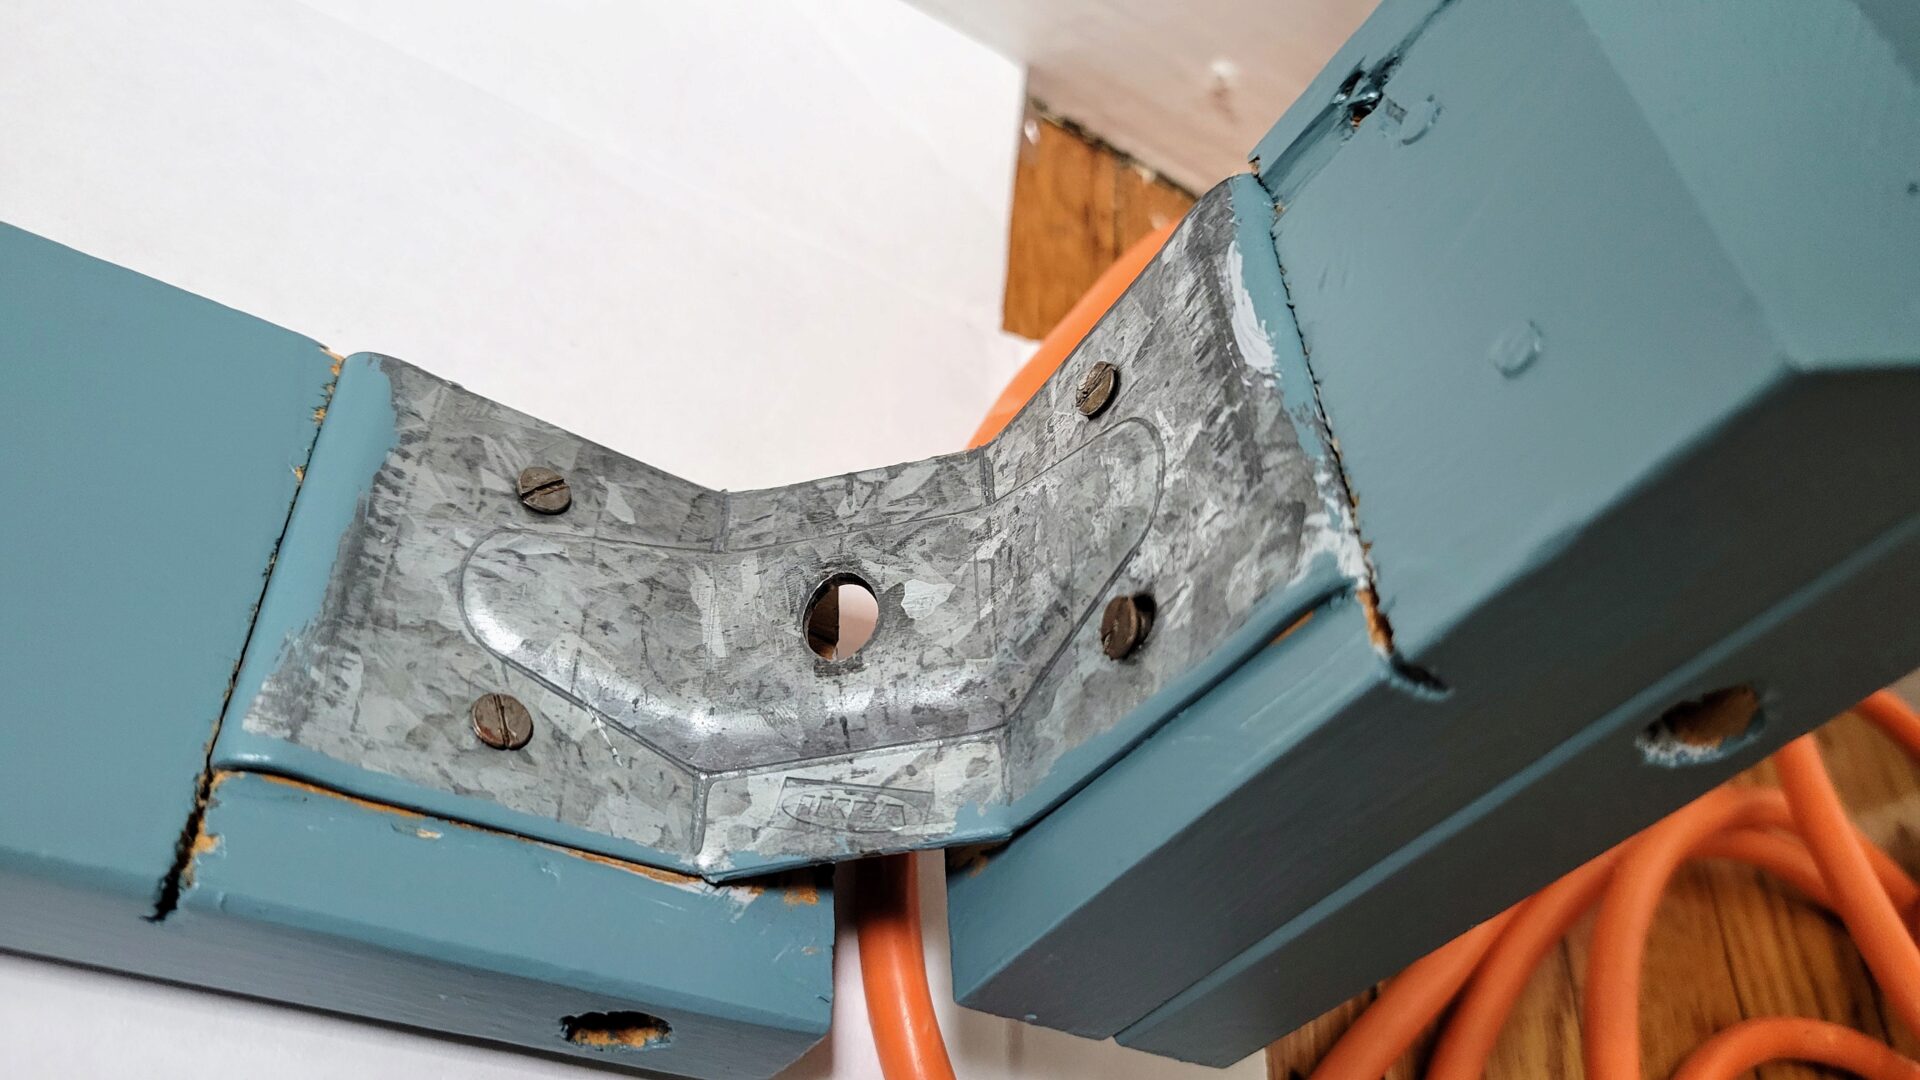
And while inspecting this hardware closer, I spotted that stamp in the metal bracket. It’s an old Ikea table! Man, how is it that everything I own ends up being Ikea?
When we were detaching the table top from the frame, things also got hairy because the screws holding the two together were very prone to stripping. There was no way we were getting those back in, so that’s another set of screws to get.
Any finally, there were the hinges holding on the fold-down leaf. They seemed a little undersized and close to the edge, so the screws had ripped out in a few places. We’d already taken the hinges out to make it easier to re-finish the top pieces, so we might as well fix this issue while we’re at it.
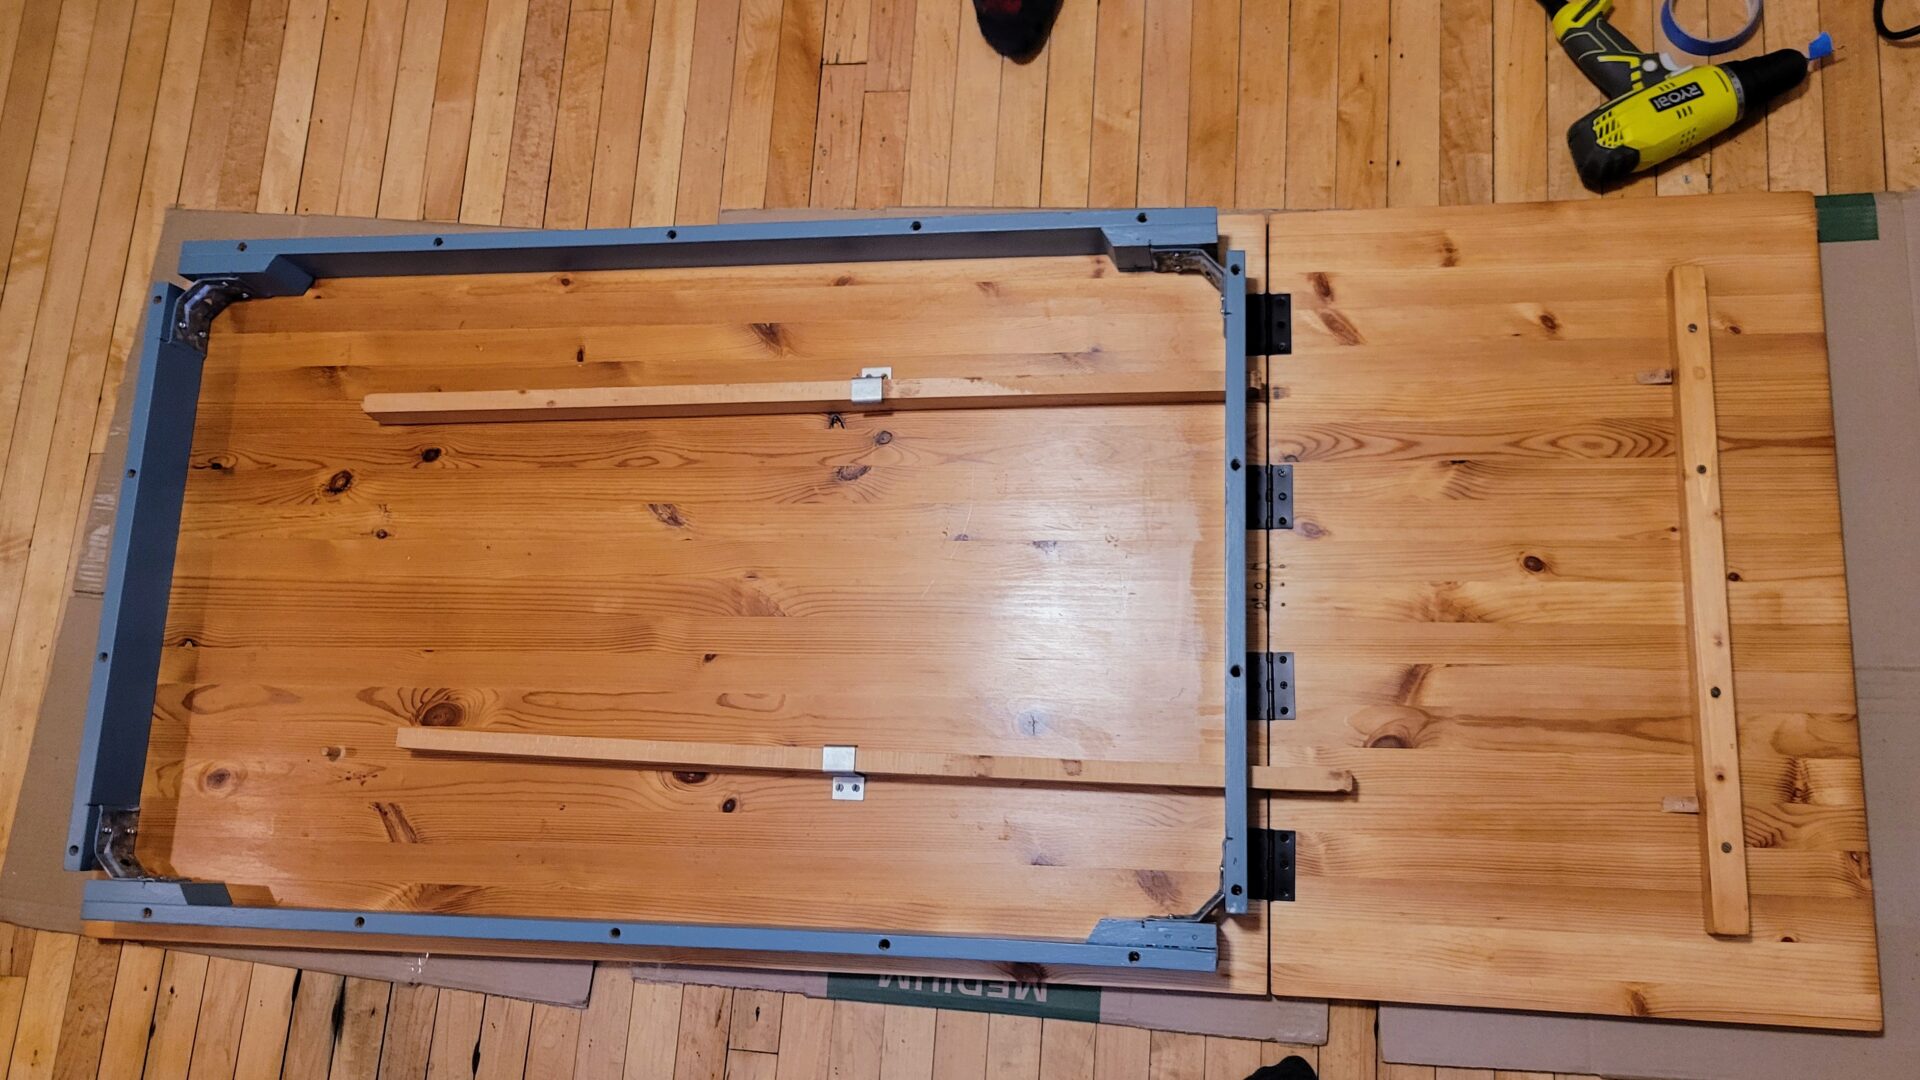
Instead of the original three hinges, we used four, partly to make it sturdier, and partly to avoid perfectly lining up wit the existing chipped-out holes.
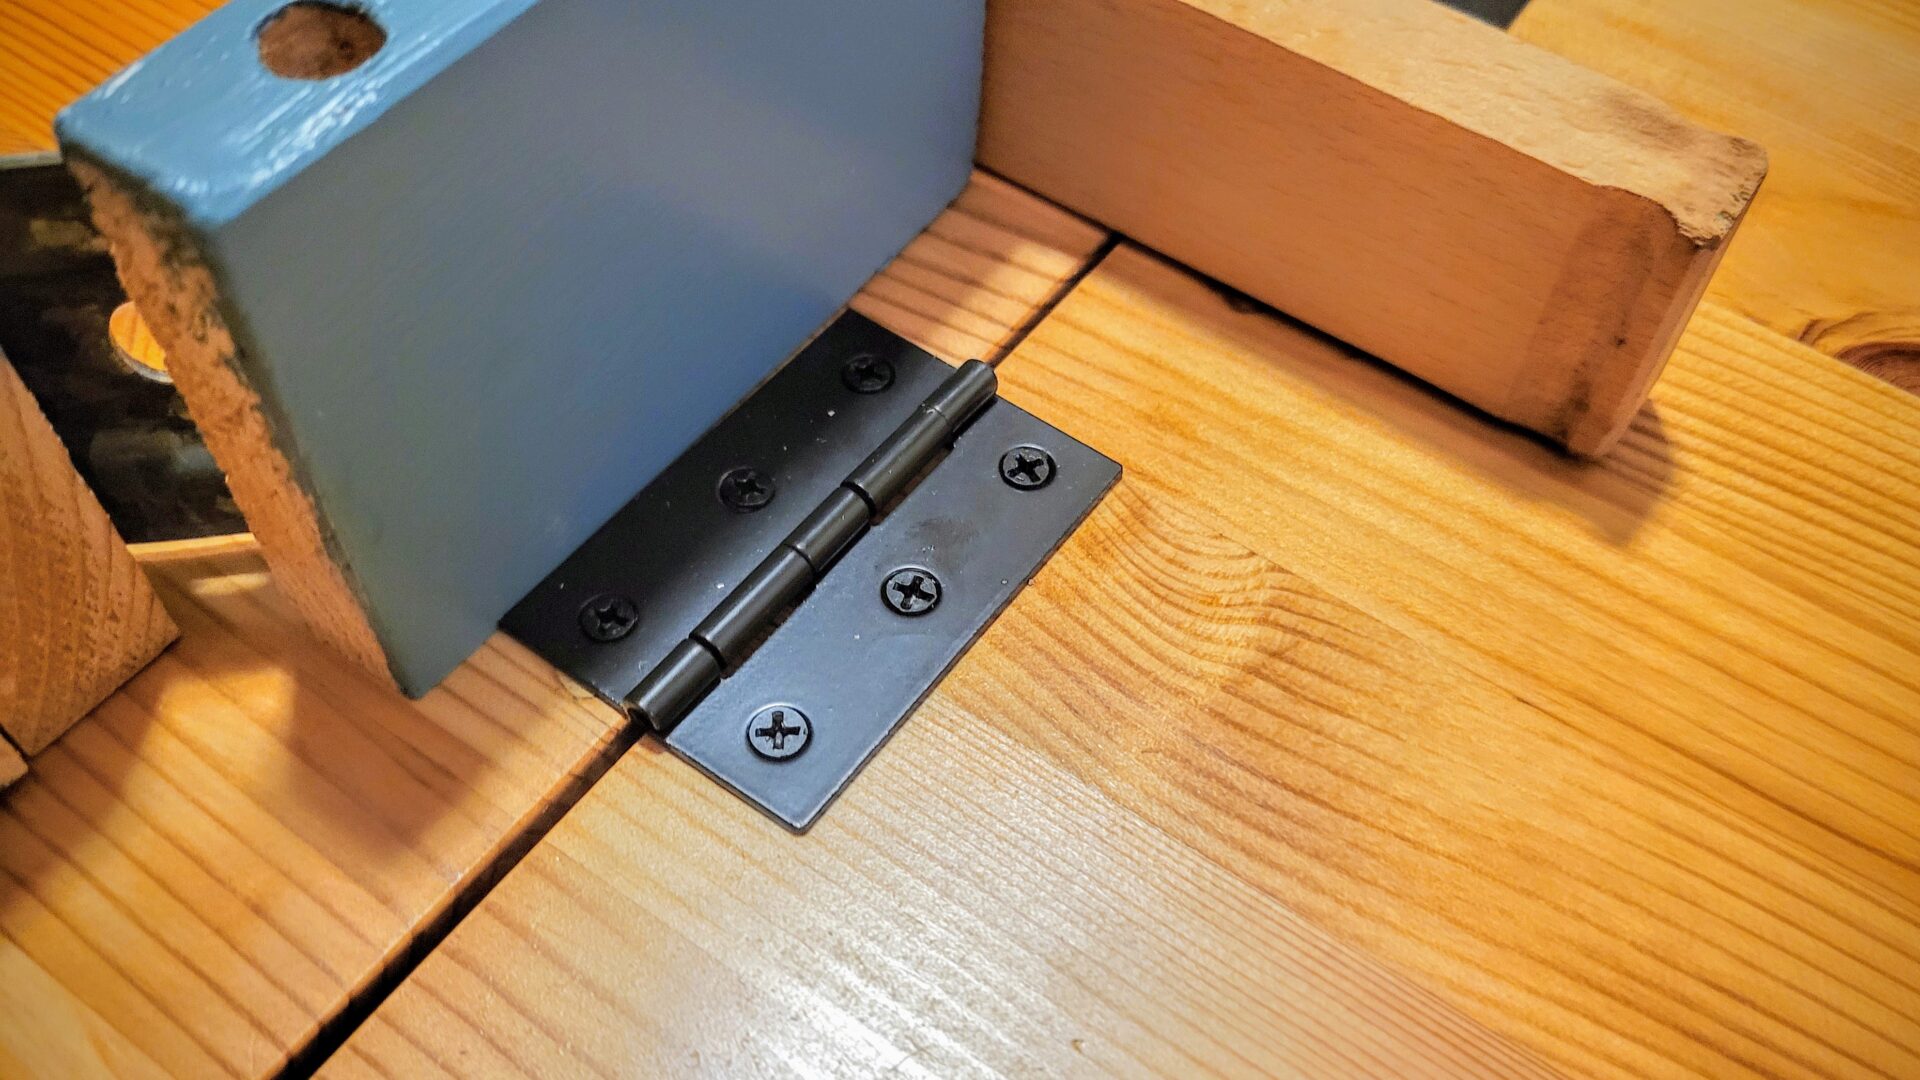
We did not leave ourselves any extra clearance on the hinges. I’m glad we didn’t go with the bigger option that I was originally looking at. Plus, the black hinges look nice, since they kind of fade into the shadow when the leaf is folded down.
And that’s it. After weeks of evenings and weekends in the heat, the final assembly went fast: screwing on the chair seats, the table frame, and the legs.
This was a good first foray into stripping, refinishing, and painting furniture. The stakes were a lot lower than if my first project in this department were refinishing an antique with actual value, rather than a third-hand Ikea table. If I encounter something like this again, I have a much better sense of what I’m doing going in (which will save time), and I have some of the necessary tools (which will ostensibly save money).
Bill of materials
Did we save ourselves any money in this endeavor over just buying a new table? For reference, you can buy a table and 4 chairs from Ikea for $139.
This bill of materials contains only the items I remember. (I don’t recall the total price of the screws, for example.) But this together total about $150.
Some of this is re-usable, like a paintbrush and sander. But for the most part? This was a learning experience and a fun project, rather than a cost-saving measure. And also: Ikea doesn’t sell a funky teal table.
| Item | Quantity | Unit price | Total |
|---|---|---|---|
| Citristrip (1 qt) | 1 | $12.97 | |
| Brush for stripper | 1 | $1.68 | |
| Black+Decker Orbital sander | 1 | $29.00 | |
| 100-pack variety sanding discs | 1 | $12.87 | |
| Varathane satin polyurethane (1 qt) | 1 | $11.97 | |
| Mineral spirits (1 qt) | 1 | $7.97 | |
| 1½” paint brush | 1 | $7.47 | |
| DAP Wood filler (3 oz) | 1 | $4.97 | |
| Rustoleum primer (1 qt) | 1 | $10.98 | |
| Sanding discs (100 pack) | 1 | $13.99 | |
| Sandpaper | 1 | $4.97 | |
| 2.5” hinges | 4 | $3.28 | $13.12 |
| Frame screws (Can’t remember exactly what) | |||
| Glidden paint (1 qt) | 1 | $12.98 |