3D Printing my Brain
Posted: 2021 March 16
- FreeSurfer setup
- Choosing your images
- Reconstructing the brain
- Simplify for printing
- Test print
- Blendered brain
- Full brain print
- Display stand
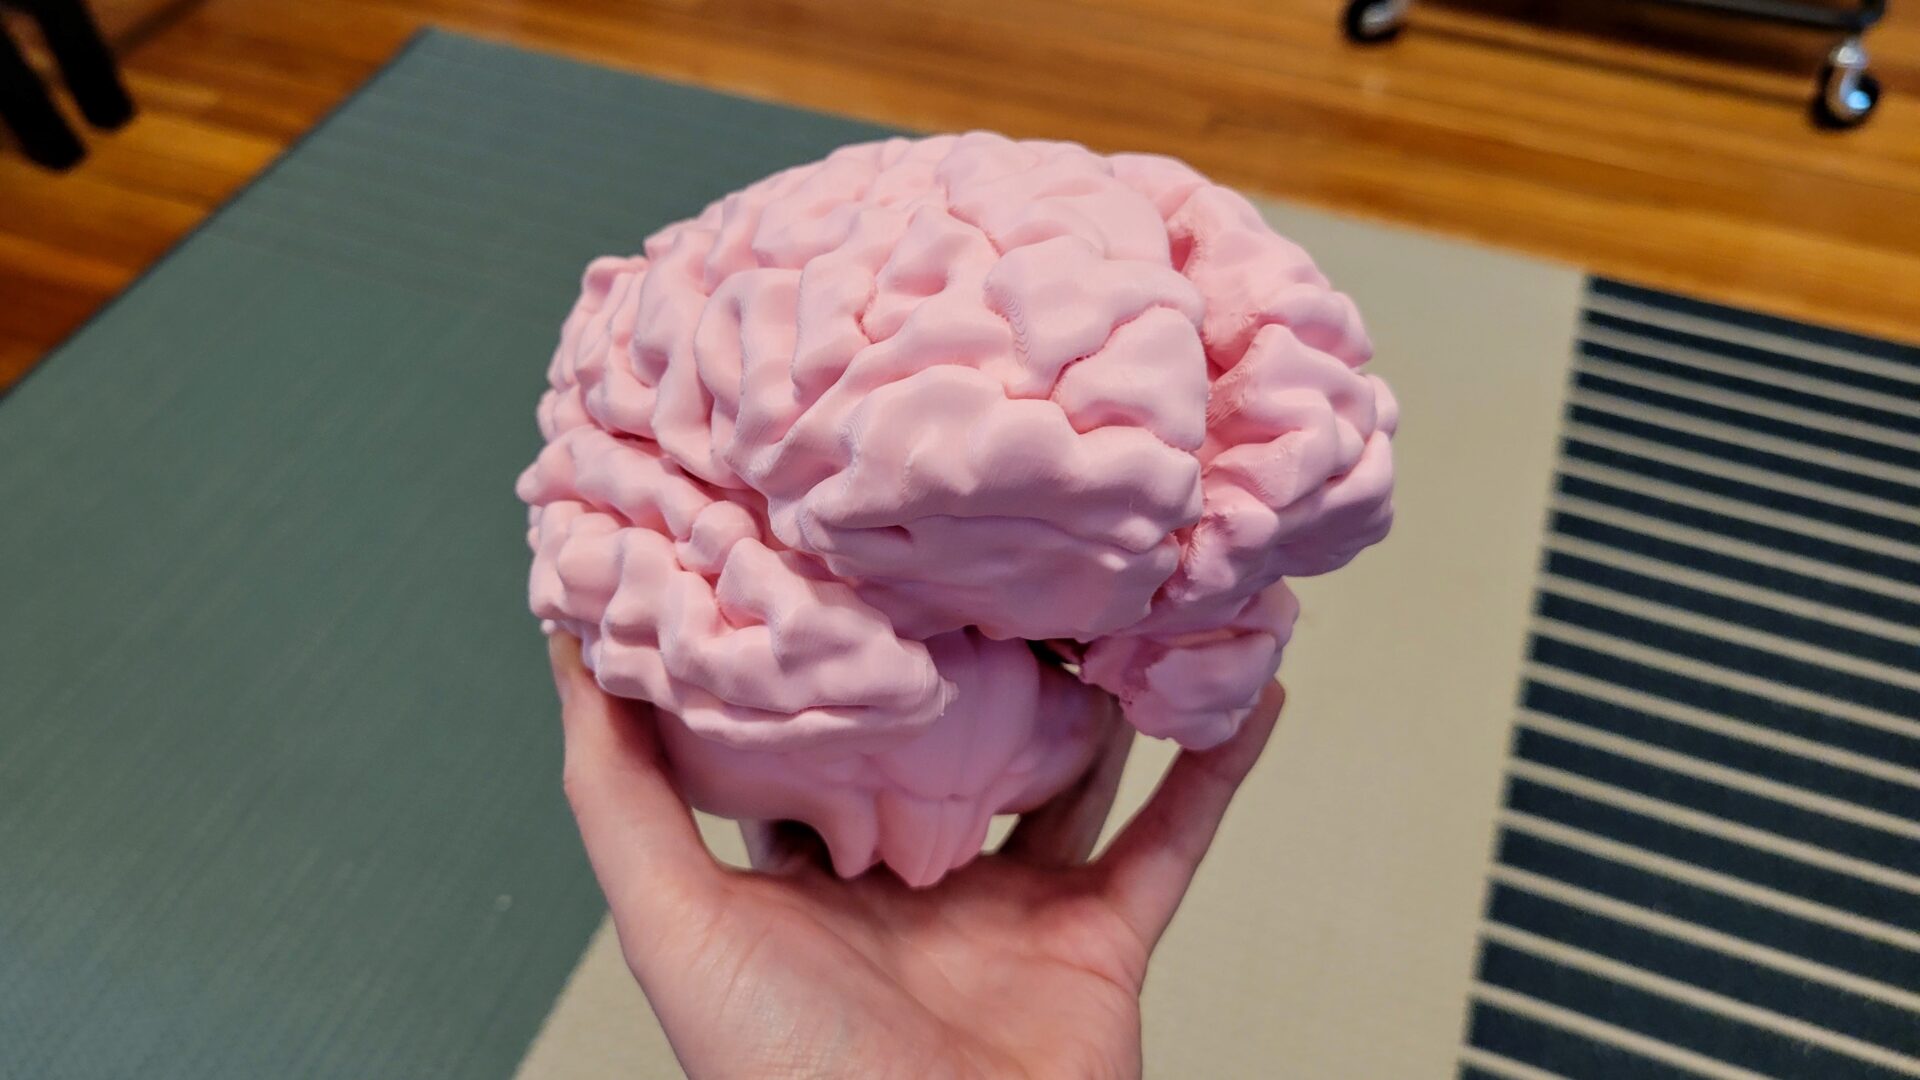
TL;DR: Look, it’s my brain!
I got an MRI of my brain, which is cool. (And now I get to be pretty confident that I don’t have a brain tumor.) This feels particularly awesome as a neuroscience major – I can actually see my own brain! And now that I have a 3D printer, how could I not 3D print my own brain? In fact, I’ve wanted to 3D print my brain for years now, so this is the highlight of the year so far. (Editor’s note: This was written before I got engaged, so it was only the highlight of the year until April 24.)
The first step was to actually get a copy of my MRI in the first place. This was as simple as asking for a copy when I got the scan, and they gave me a DVD with all of the data. It even came with a built-in viewer, so I could look at the MRI images… in Windows only. That doesn’t matter too much, since I won’t be using that for this anyway. But it was cool to be able to scroll through all the images.
I knew that it was possible to convert the MRI to an STL for printing because I googled it and other people did it. The biggest thing I’ll need is FreeSurfer, which is a free research software for doing a bunch of stuff with brain data. In this case, it’ll take in the MRI images, strip out everything that’s not the brain, and then do a bunch of maneuvering to convert that into a 3D model.
The challenge is that this is research software. And while it appears to be pretty well-maintained and managed, it still has the awkwardness of use and installation that I’ve come to expect from research software. And they also appear to have changed the API slightly over the years, making old tutorials frustratingly less useful.
What I’ve done here is cobbled together from various tutorials online: Blog post from Nikki Marinsek, 3D print your brain repository, and guide from Sculpteo.
FreeSurfer setup
First, installing FreeSurfer. It works on Linux and Mac. They only have an installer package for CentOS and Mac (otherwise you have to install it from a tar file), so I lazily decided to do this on my Macbook Pro.
Although the current FreeSurfer version (7.1.1) is not designed for Mac OS 11 (Big Sur), a quick Google search showed it worked fine for people. The annoyance here was Apple’s tight-assed security system. I couldn’t install right away from the .rpm file. When I tried, it complained that it was from an unknown developer. So then you have to go to the machine’s Settings > Security & Privacy > General, and then click the button to allow running that particular thing it just refused to let me run. Luckily, this is all explained in the installation instructions.
These instructions also require that you manually set some paths for your terminal. If you’re just doing this once, copy and paste them directly into your terminal. (They won’t last once you close your terminal.) If you’ll use this more, paste them into your .zshrc or .bashrc file (depending on which shell you’re using).
export FREESURFER_HOME=/Applications/freesurfer/7.1.1
export SUBJECTS_DIR=$FREESURFER_HOME/subjects
source $FREESURFER_HOME/SetUpFreeSurfer.sh
Since this will come up later, you’ll also want to get a free license for FreeSurfer that will let you use it. Simply fill out the form here. (Most of the fields aren’t even required.) Then copy the resulting “license.txt” to $FREESURFER_HOME/license.txt.
Choosing your images
My MRI data from this DVD came in a bunch of uselessly labeled folders and file names (e.g., “ST001/SE000004/I000131.dcm”). They’re meant to be looked at with the included software, not directly in your file explorer. Whatever the source, you’ll want to look for the DICOM files (the .dcm) extension. It’s basically a fancy image format.
In my case, there were a bunch of these “SE” folders, each representing a series of images taken – i.e., a pass through the brain. They have different settings, so you’ll want to pick the one that will produce the best 3D model.
Here, I ended up installing a viewer to choose the best set of images. Based on this repository I decided to look for the set of images that was a T1 sagital (side) view. I installed Horos because it’s free and runs on Mac; I don’t need anything fancy here.
Within Horos, I clicked the “Import” button and selected the folder containing all of the subfolders/images. Then, I chose the option to link to the folder instead of copying the files. This popped up with all of the labeled images series.
I clicked through until I found a set labeled T1, that was a side view.
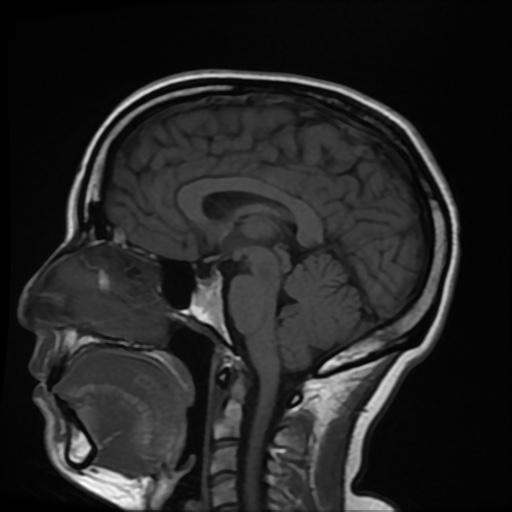
Look at that nice brain. It’s amazing to be able to see the features I spent five years learning about. There’s my corpus callosum! And the pons and all the gyri of every lobe, and all the fine structure of the cerebellum!
I right-clicked on the row for the series of images, then picked “Reveal in Finder.” This took me to the correct folder with the set of images I’m looking for. For me, that was “ST001/SE000004/”. Remember that folder!
Reconstructing the brain
Now it’s time to convert those images into a 3D model. This comes down to running a single command that takes a really long time to run. (I mean it – it’s doing a lot of optimization of the model, so we’re talking hours.) The structure of the command looks like this:
recon-all -i <DICOM_FILE> -subjid <SUBJECT_NAME> -parallel -all
DICOM_FILE is a file from the folder you found above. (It doesn’t matter which one. It’ll find the rest in that folder.) SUBJECT_NAME is a tag/ID you pick for your subject (in this case, yourself). I just used jtebert. The -parallel tag will let it use more of your processor.
If you get an error when you run this that says you don’t have permission, that’s because it’s putting files into the Applications folder (which isn’t owned by your user). I think this is a bad way to write your code, but it’s research code. Anyway, the problem can be fixed with:
sudo chmod -R a+w $FREESURFER_HOME/subjects/
If this works correctly, it should take a long time, and you’ll see a lot of output as it works.
When this finally finishes, look in $SUBJECTS_DIR/<SUBJECT_NAME>/surf. There will be a bunch of files in here, but what you’re looking for are lh.pial and rh.pial – left and right hemispheres.
Now, we can convert these two separate pieces into a single STL within your subject folder, called cortical.stl.
mris_convert --combinesurfs $SUBJECTS_DIR/<SUBJECT_NAME>/surf/lh.pial $SUBJECTS_DIR/<SUBJECT_NAME>/surf/rh.pial $SUBJECTS_DIR/<SUBJECT_NAME>/cortical.stl
Simplify for printing
For safe-keeping, I copied that cortical.stl out of the subjects folder into a new location in my home folder to use for this next simplification step.
This is now probably a pretty rough-looking STL for printing. It’s time for MeshLab to simplify it. (I’ve never used MeshLab before. This is also just straight up following the tutorials I found mentioned above.) When I imported, I checked that box for “unify duplicate vertices.” From there, all I did here was apply a filter to smooth it out: Filters > Smoothing, Fairing, and Deformation > ScaleDependent Laplacian Smooth. Based on the tutorial, I set Smoothing Steps to 100, world unit to 0.02528, and perc on to 0.100. I have no idea what these do. But it did smooth out the brain. From here, I used File > Export Mesh to generate an STL.
Test print
With this first version of my brain, it was time for a test print. Given the size, I scaled it down to 50% (which is really 50% in each dimension, so 1/8 the volume). I printed the whole thing upright with supports underneath; there’s no way to avoid supports on something like this.
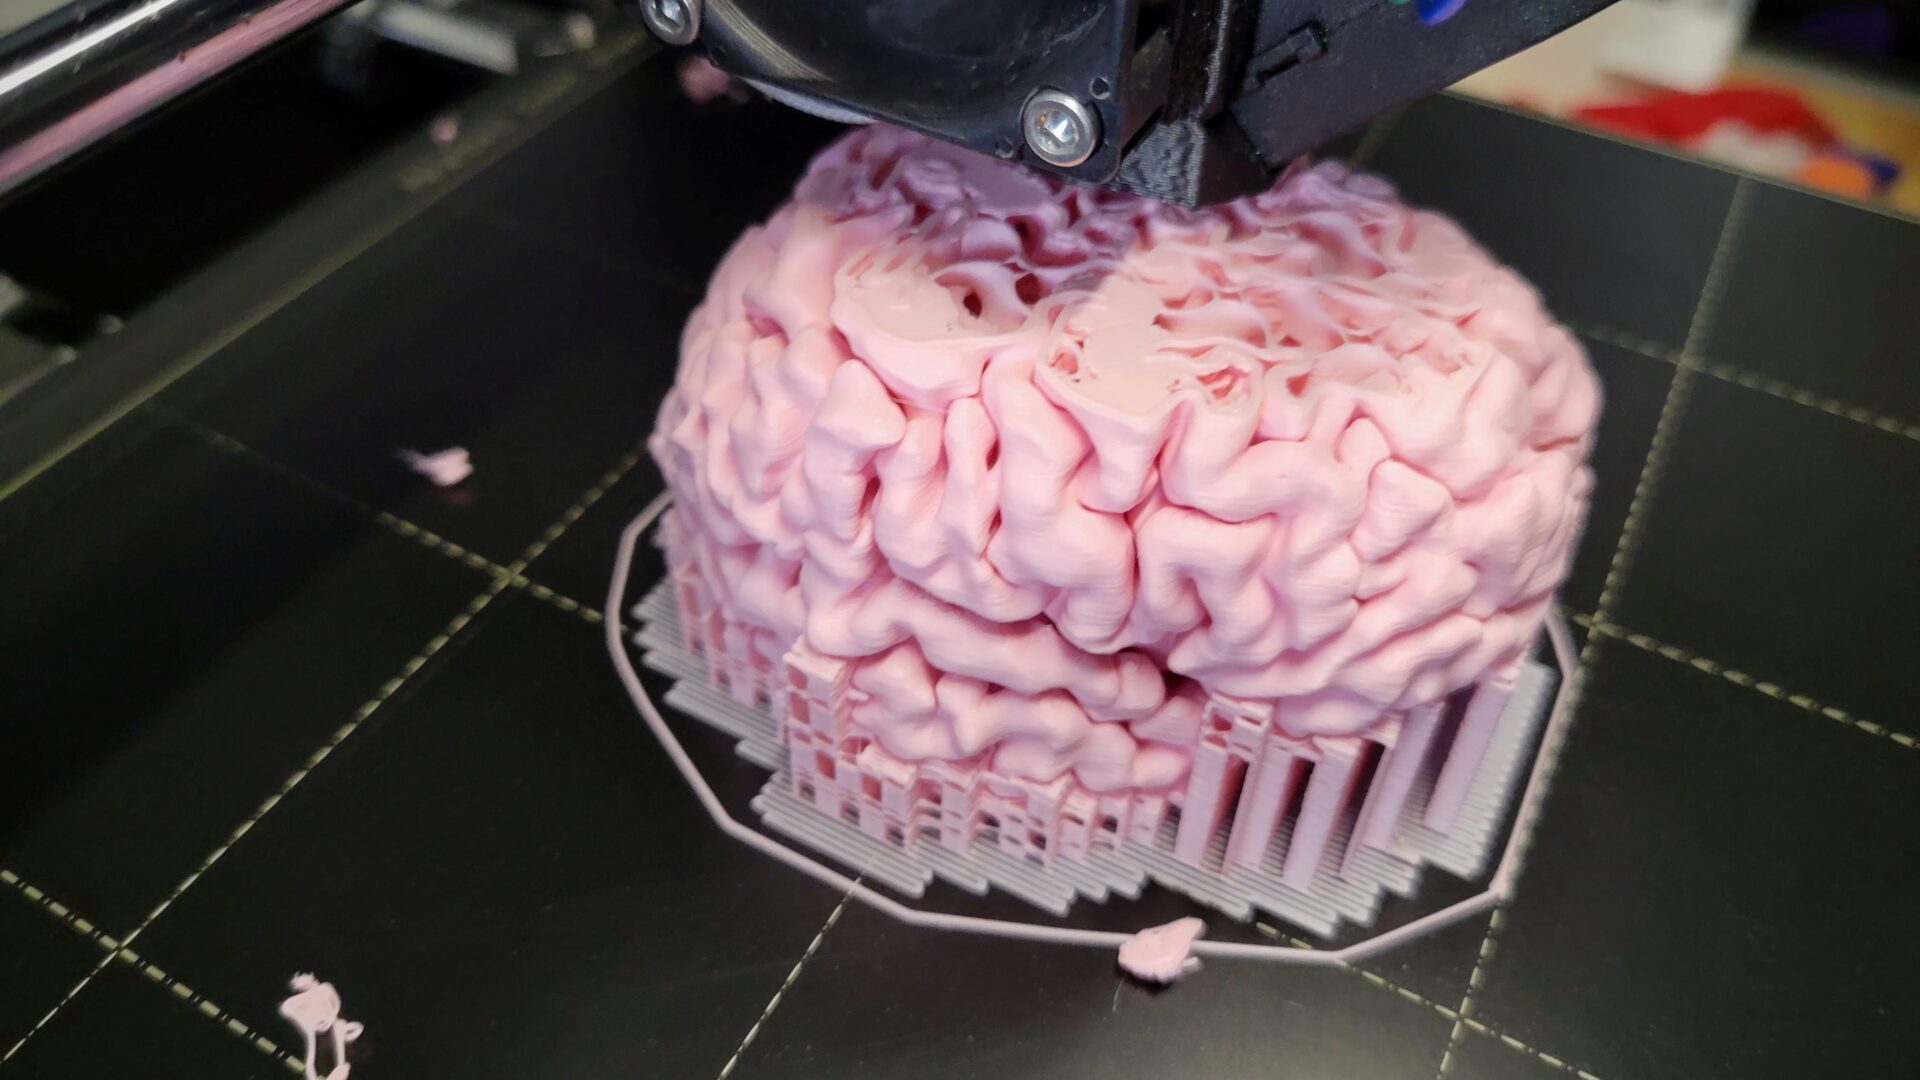
It’s a really cool feeling to see my brain coming to life in physical form as it’s printed. But mid-print, you can see a couple of issues. There are a couple of stray brain bits on the print bed, because the support material didn’t have enough surface area to support these gyri (at least, I think that’s the issue with the support material). It wasn’t enough to make the print fail, but there are some wonky spots on the underside. Also, despite the low infill ratio, you can see a lot of solid spots in the print. That’s because in the real brain, the goal is to maximize surface area, so the sulci (grooves) go really deep. None of that will show up in the final print, but it significantly increases the print time and the amount of filament used – to the point that the little brain is a noticeably than I expect for a print that size. This is something I realized I want to fix before printing the whole brain, where these deep sulci are going to use up a lot of filament.
But when it’s finished, it’s a pretty cool desk decoration.

However, the support issues showed pretty clearly once the supports are removed and you look at the print from the bottom or side. For the final full-scale version, I’ll increase the angle that gets support. I started with my default of 35 degrees from horizontal, but that comes from non-organic, parametric CAD models, where there aren’t these kind of weird protrusions.
Blendered brain
For the final brain, my goal is to make two hemispheres that are held together with magnets. (Who doesn’t want to be able to take apart their own brain and snap it together??) That requires modifying the brain mesh to subtract cylindrical holes to place the magnets in.
I also want to add in the corpus callosum, brain stem, and cerebellum, to complete the brain. Those pieces don’t get nicely, magically processed by the scripts I used, so I’ll need to do more work to add those in.
And I need to fix the deep sulci that will make the print eat all my filament.
All of these changes are probably beyond the scope of MeshLab (which already had a very confusing interface to me). Time to pull out the big guns: Blender. Which I’ve also never used, but have been intending to learn for probably the past decade. And Clark has some previous experience with Blender to help flatten the notoriously steep learning curve. Perfect combination.
Before I get into this, let me say: this was a rabbit hole. And I might have been using Blender (or the mesh) incorrectly, because I managed to get Blender to freeze and crash my computer with the scale of this model, despite me having 32 GB of RAM, an 8 core processor, and a 2070 Super GPU.
Extracting the subcortical structures
As I was trying to figure out how to extract the subcortical data in very hacky ways, I discovered this tutorial which solved my problems. Bless whoever wrote this up.
I pretty much exactly followed the steps they laid out by copying and pasting code, so I’m not going to repeat it here.
Combining and cleaning up
With voxelated 3D models of the brain stem, cerebellum, and corpus callosum, I diverged from the tutorial. I found that just using the ScaleDependent Laplacian Smooth in Meshlab (like I did for the cortex) created a really messy model. The algorithm for extracting the volume from the MRIs doesn’t have the same level of optimization as for the cortex. Given that this program was created for research, and these brain areas don’t get the same granular precision. That means it’s up to me to clean things up.
And honestly, things got really messy here. There was a lot of trial and error trying to get things to work correctly. So I’m not going to give a lot of details here, because I honestly don’t remember what of my trial and error I ended up keeping, and what’s actually useful from that.
The first piece I tackled was the cerebellum and brain stem.. I had to go from blocky voxel structure to human brain shape. The first step was smoothing the whole thing. This got rid of the blockiness, but I still had to fix artifacts causing weird bumps and protrusions. I just went at it with the sculpting tools to smooth out the cerebellum. Then I wanted to add additional defintion to the pons and medulla, to distinguish them from the cerebellum. (This got lost in the smoothing step from voxels.) The challenge was that my mesh wasn’t dense enough: I got these choppy jagged effects instead of a smooth crevice when I tried to sculpt. So I just re-meshed to get more points. To get it dense enough to do the smooth sculpting I wanted, I created a ridiculous mesh. Once I was done sculpting, I decimated the mesh to 3% of its original and it still looks perfectly smooth. This makes me think I wasn’t doing this right. Also, any modifiers involving this dense mesh absolutely chug. I spent a lot of time just waiting for Blender to apply any modifier changes.
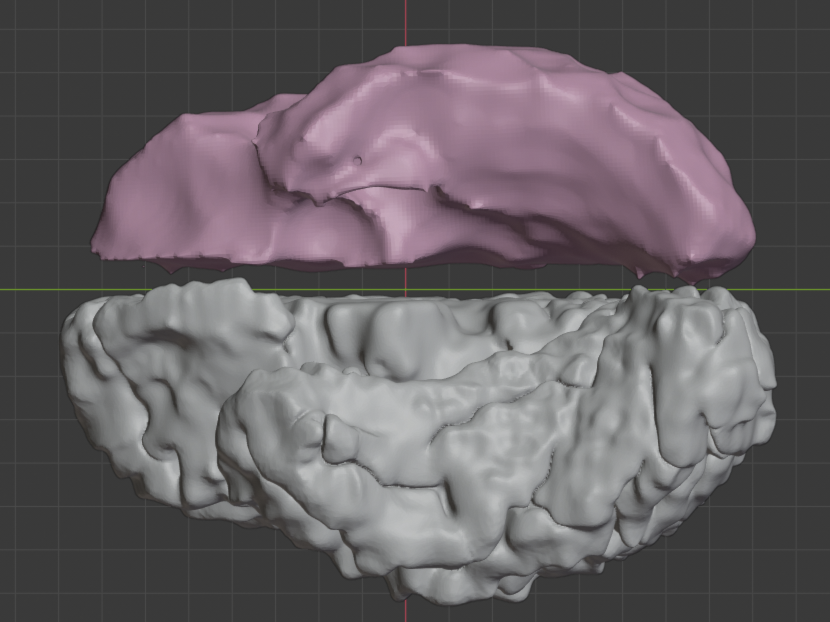
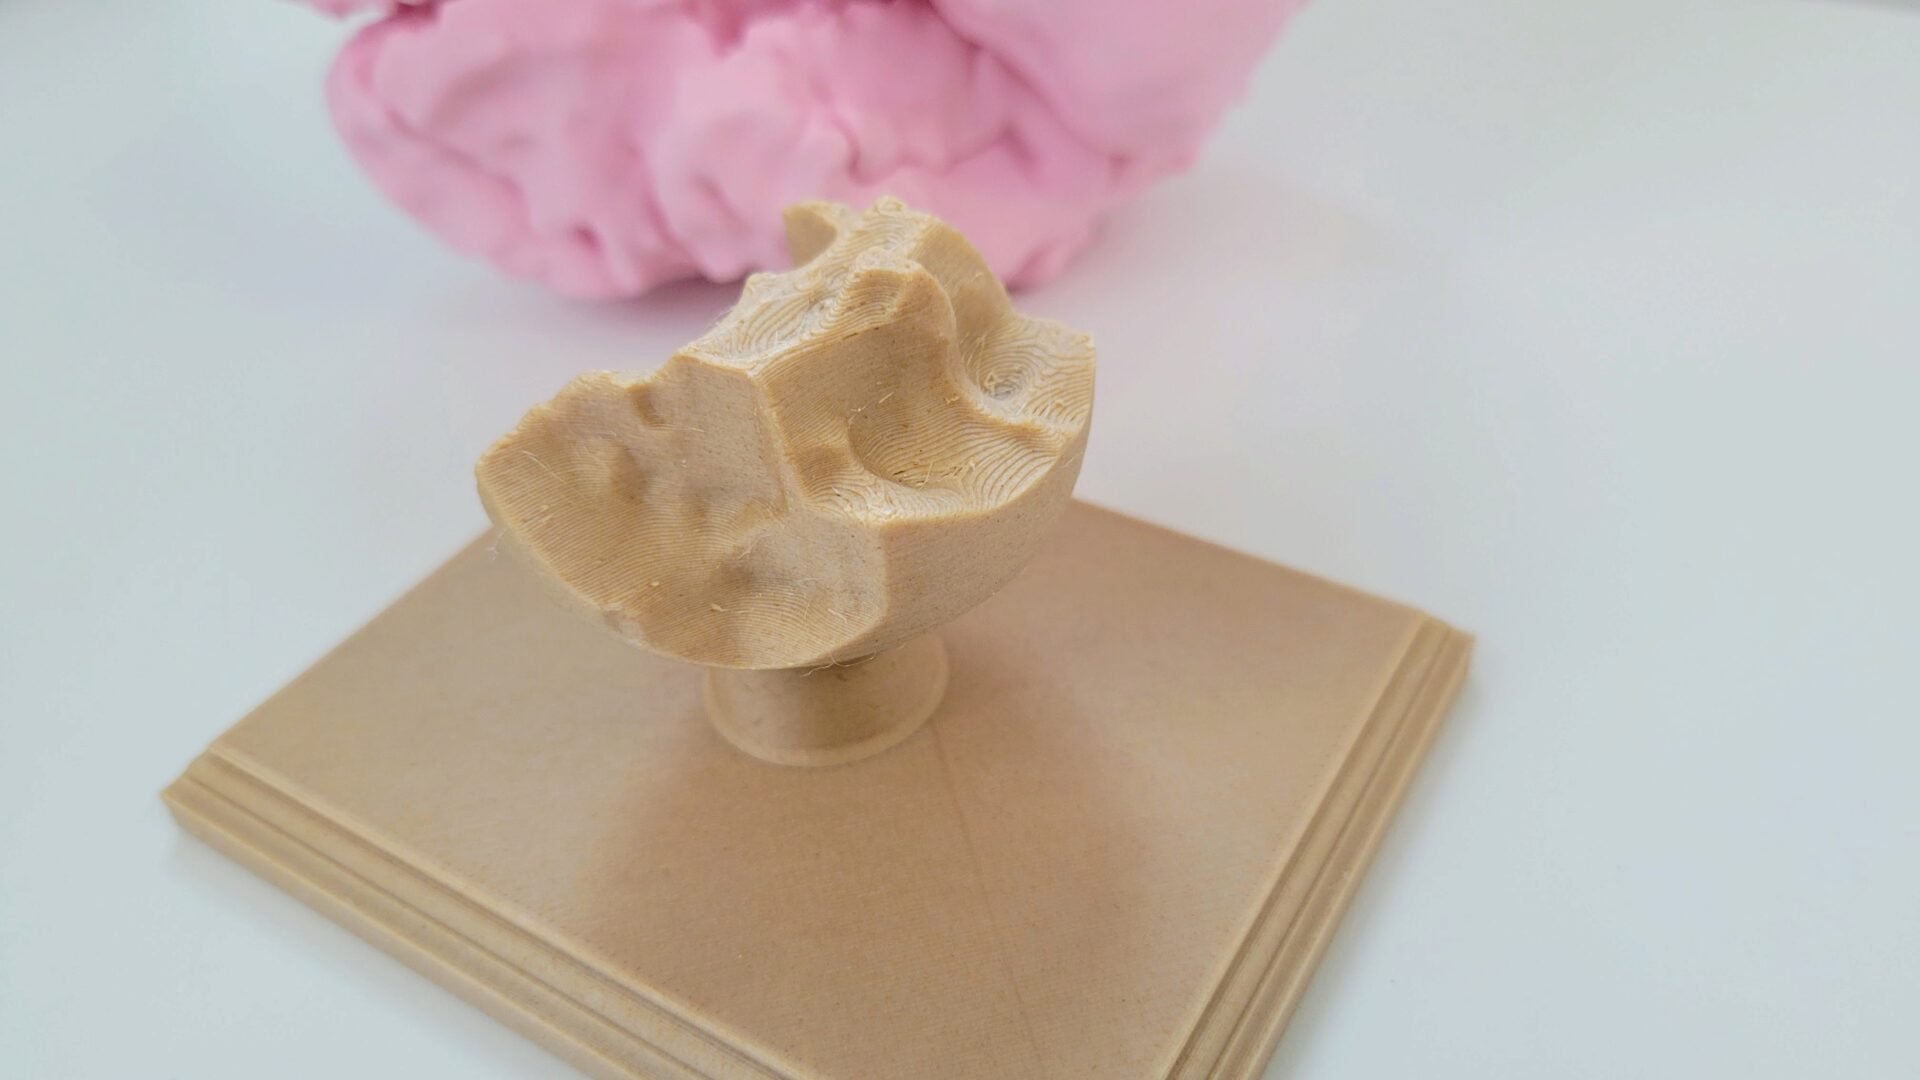
Next, I have to fix the unnecessarily deep sulci. Well, unnecessary from a model printing perspective; I do appreciate having the large surface area in my actual brain. My idea was this: Create a smoothed version of the hemisphere, and shrink it inside the “real” hemisphere. Then boolean add the two together so that the smooth mini-hemisphere fills in the sulci. This involved a lot of trial and error with Blender modifiers; I know the concept I wanted to achieve, but didn’t know how to get there. The other problem here is that there were weird artifacts in the original hemisphere mesh: self-intersections, singularities, detached little pieces inside. This meant that a lot of the operations (especially booleans) caused weird behavior like creating holes in the mesh. The result required some remeshing and smoothing of the original hemisphere with Blender modifiers: Smooth (Factor: 0.5), remesh (mode: Smooth, Octree Depth: 4, Scale: 0.9, “Remove Disconnected Pieces” checked), and a Catmull-Clark subdivision (Quality: 3, Subdivisions: 1). This unfortunately caused some of the gyri to fuse to each other, but I don’t think anyone else would notice this unless I pointed it out.
Anyway: Back to fixing the sulci. After all that work to figure out a way to do this, I forgot before I wrote it down. Kids, this is why we don’t wait to write documentation. That said, here’s what the “inner” brain looks like (top, in pink), compared to the original brain model.
With the sulci filled, the next step was adding in the corpus callosum. By this point, I was getting lazy. Also, the corpus callosum doesn’t need to be that precise; you barely see it. So I imported the voxelated model and threw some simple smoothing on it. Now I got a little tricksy, compared to the real brain. I wanted the mid-sagittal plane of each hemisphere to be really clear, but there isn’t really any space between them. So I nudged out each hemisphere away from the centerline by a few millimeters, and scaled my corpus callosum model out in that dimension as well. By this point, I have a million modifiers applied to everything, massively slowing down every change that I make. So I created a copy of this version with the modifiers, then in the new version, I applied all the modifiers. This loses the history, but it means I’m not waiting for all of that to recompute all the time.
Now it’s time to combine the pieces: cortex, corpus callosum, and hemispheres. I boolean added together the corpus callosum, cerebellum, and one hemisphere of the brain (incredibly slow). Then I applied a decimate operation to simplify this enormous mesh (otherwise the next step was impossibly slow). Then I made a giant box for each hemisphere, which will encloses that half of the brain, and did a boolean intersection between that and the hemiphere+CC+cerebellum (also incredibly slow). Rinse and repeat for the other half.
The last step is the magnets. I created a cylinder for the size of the hole I wanted to create, and positioned it 0.2mm in from the center plane, which is one layer of the print. (Or since Blender uses meters where the STL is millimeters: 0.2m in.) I copied and pasted a bunch of these across the areas that touched the center, then mirrored these across the center plane. I boolean subtracted these from each brain half, and that’s it. If I tried to do anymore decimating at this point, I’d lose the shape/size of the holes, and flat bottom surface. So if I want to make the output file smaller, I have to back up a bunch of steps and redo it. Which I didn’t so own of my brain STLs is 184 MB (but the other is only 34 MB). And now, an update to Blender means that my smoothing operations are no longer behaving the same, so now I can’t even easily go back and try to fix that!
Full brain print
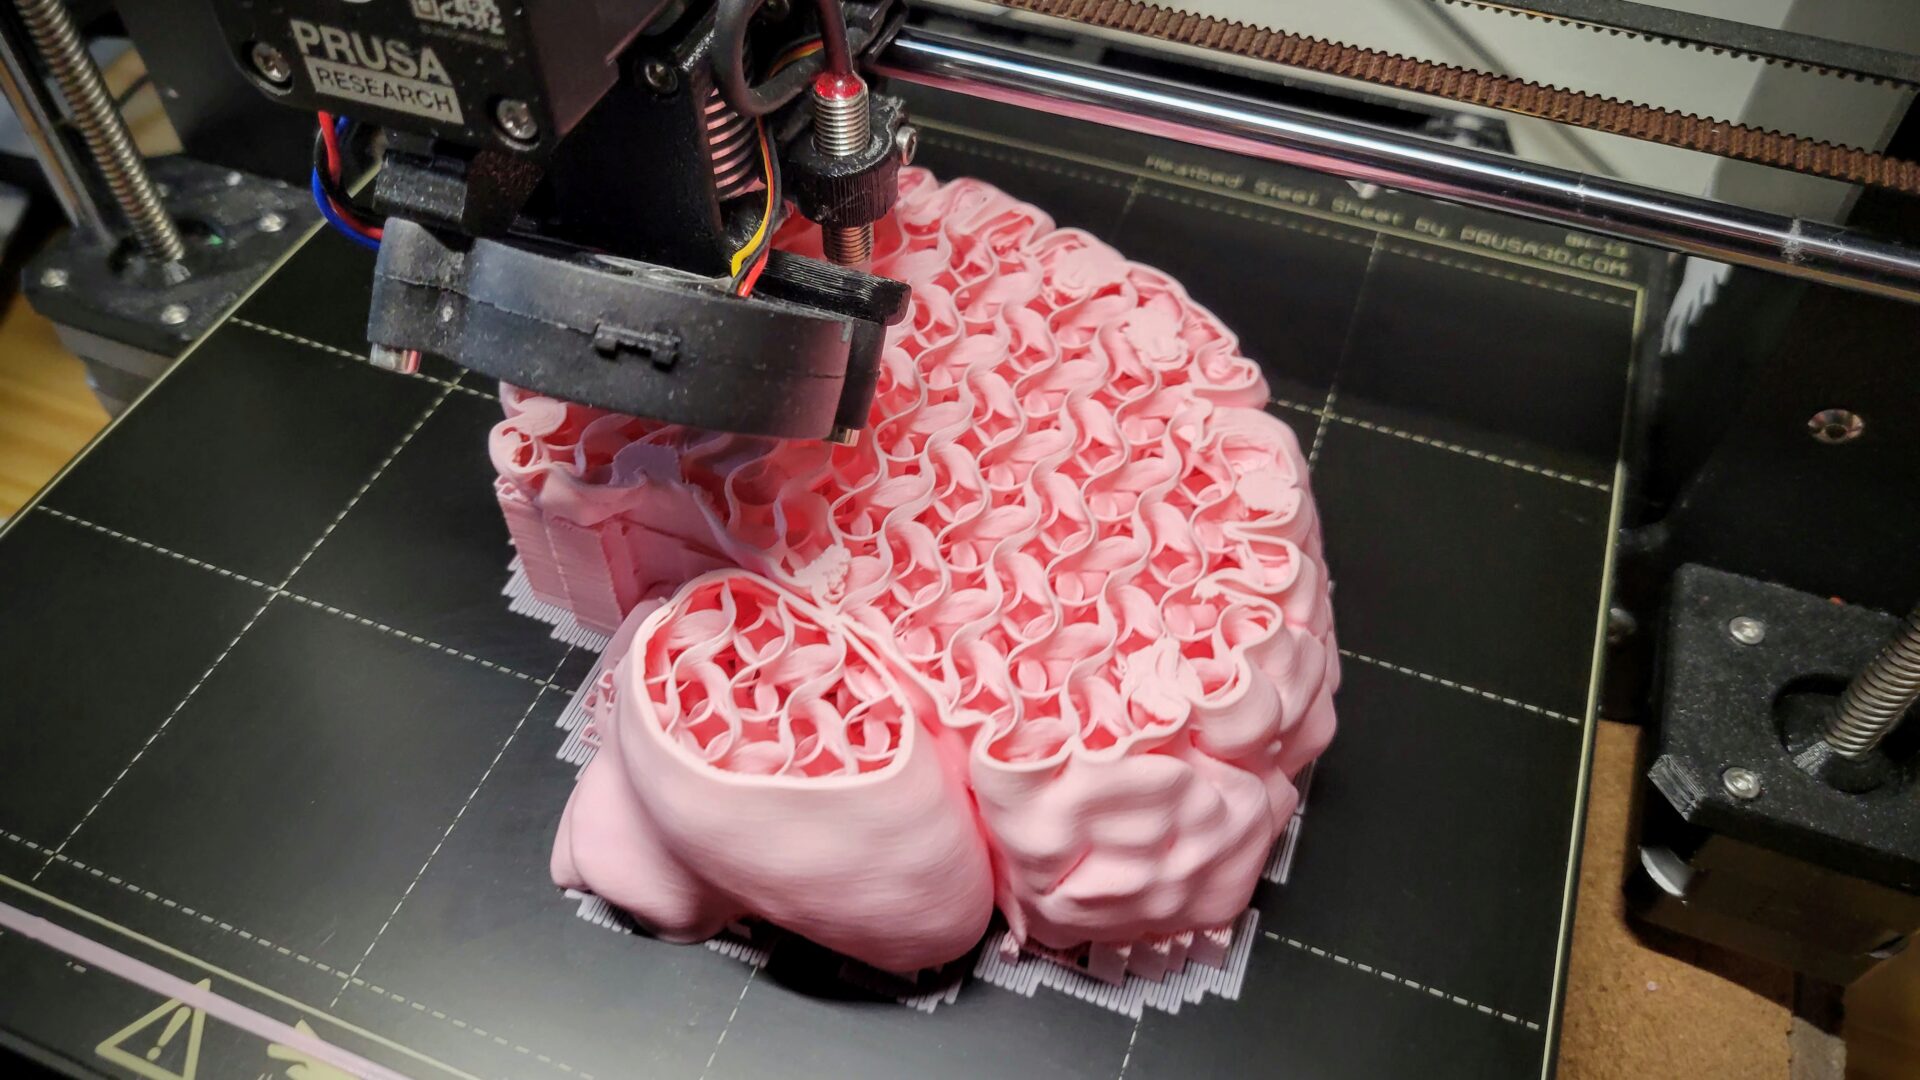
Time to print a whole brain! While the mini-brain was printed together as a single piece, now I have a separate print for each hemisphere. This is nice because I have a relatively flat surface for printing, which means less support material. But the only parts that are touching the print bed are the cerebellum/brainstem and the corpus callosum. Everything else is slightly off the bed, so you get the texture of the mid-sagittal surface of the hemispheres. Because I wanted to get a nice seamless connection between the hemispheres, I also used the smooth print bed on my Prusa. This also has the benefit of increased bed adhesion. So let’s get printing!
As you can see from this mid-print-picture, the sulci no longer go as deep as in the mini-brain. Thanks, tons of time in Blender! And you really can’t tell from the finished brain.
What you can’t see in that picture (and what I forgot to take a picture of) is the way I embedded the magnets in the print. My model already has cylindrical holes in it to place the magnets in, which begin just one layer up from the bottom. Within PrusaSlicer, I just scrolled up in my sliced model to the first layer covering the magnet holes, then right clicked the “+” in the sliced model. Now, I can add a pause in the print – M601 in GCode. Now, the print will pause at the start of this layer for me to drop my magnets into their holes. Unfortunately, for some reason, prints run through Octoprint don’t respect this pause command and just continue on printing. (Fortunately, I learned this before my brain print.) So I had to print my brain from the SD card, which is a relatively small inconvenience.
When it comes to inserting the magnets, the print bed is conveniently steel, so the magnets easily stick down. The important thing, though, is to make sure you put them in the right orientation, so that the brain won’t repel the other hemisphere! Also convenient: the standard nozzle is brass, which isn’t ferromagnetic, and therefore won’t cause issues with the magnet. If you’re using a hardened steel nozzle, this might be a problem. When I printed the first hemisphere, I just dropped the magnets in and relied on the print to hold them in place. But if you shake it, the magnets are just loose enough to make some noise. So for the second hemisphere, I added a dot of super glue into the magnet hole before putting the magnet in. It doesn’t take a lot to keep them in place, and super glue sticks great to PETG, PLA, and magnets.
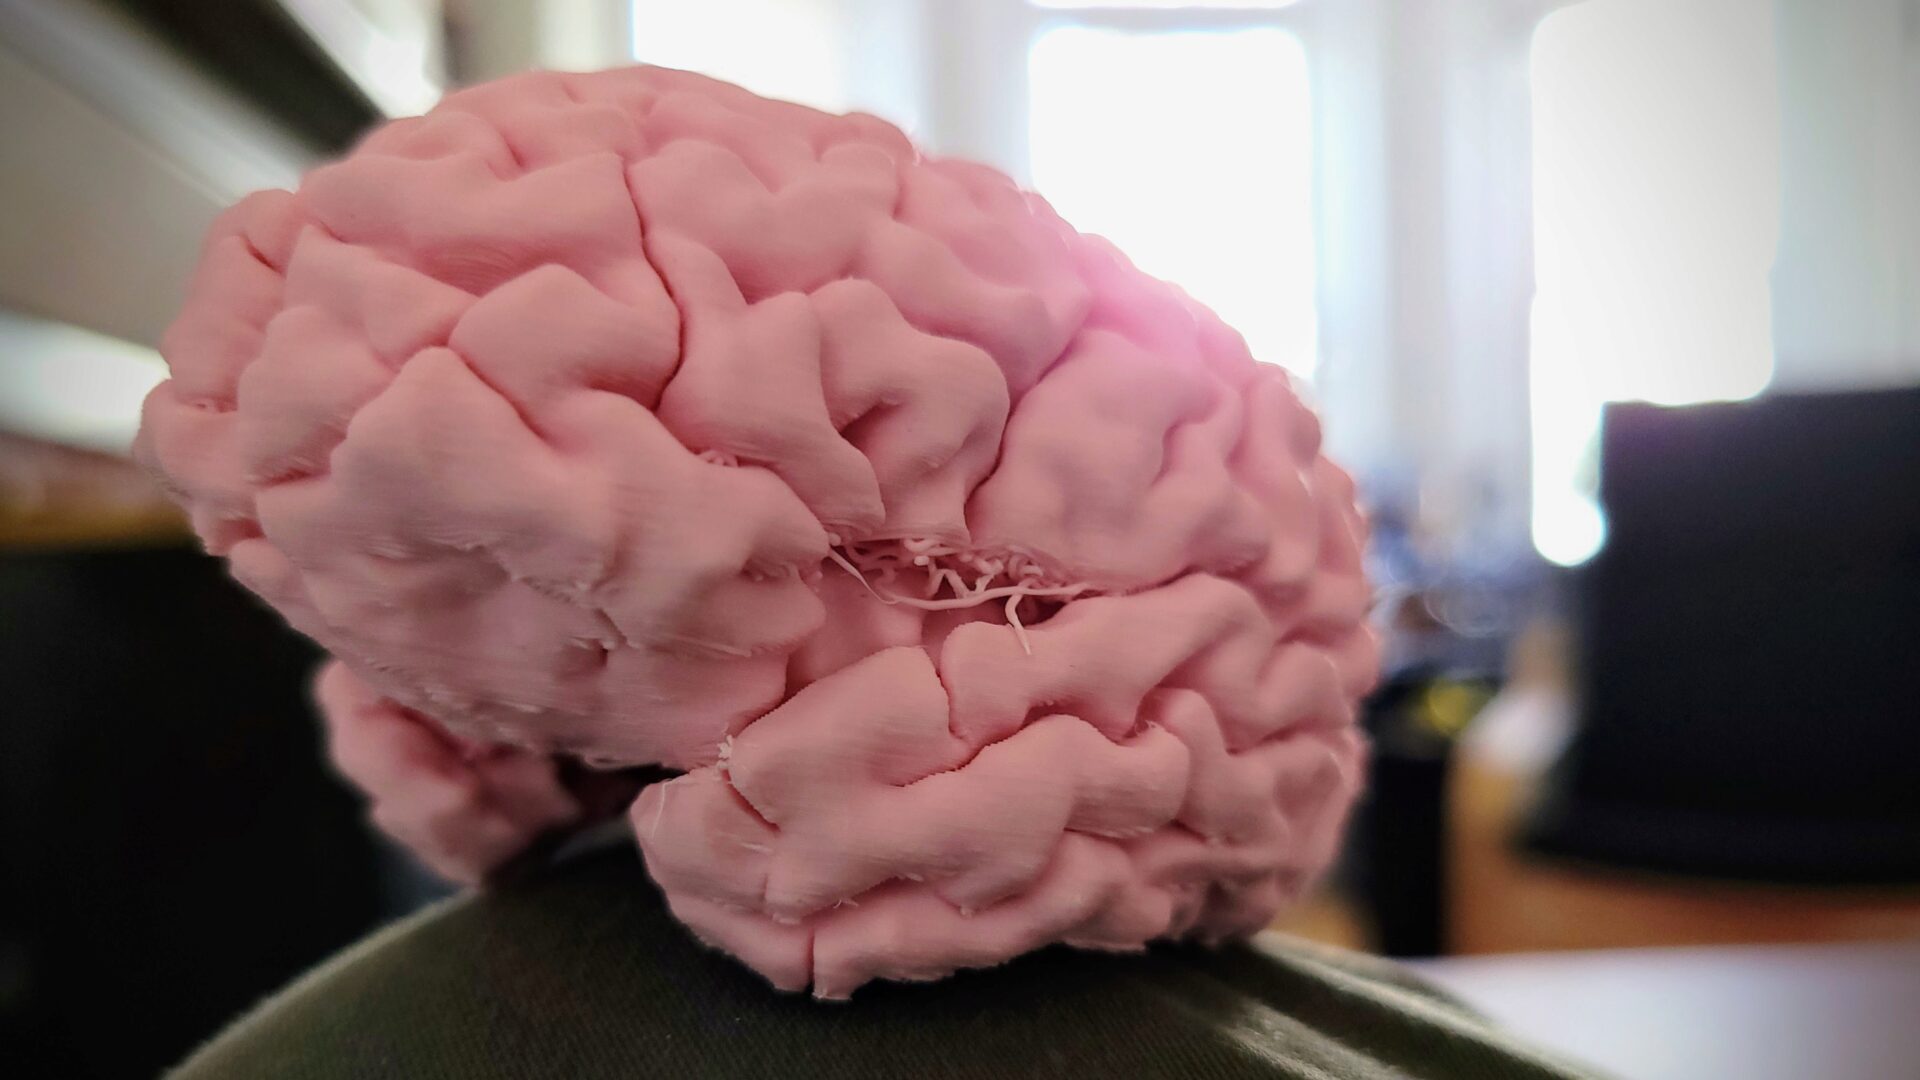
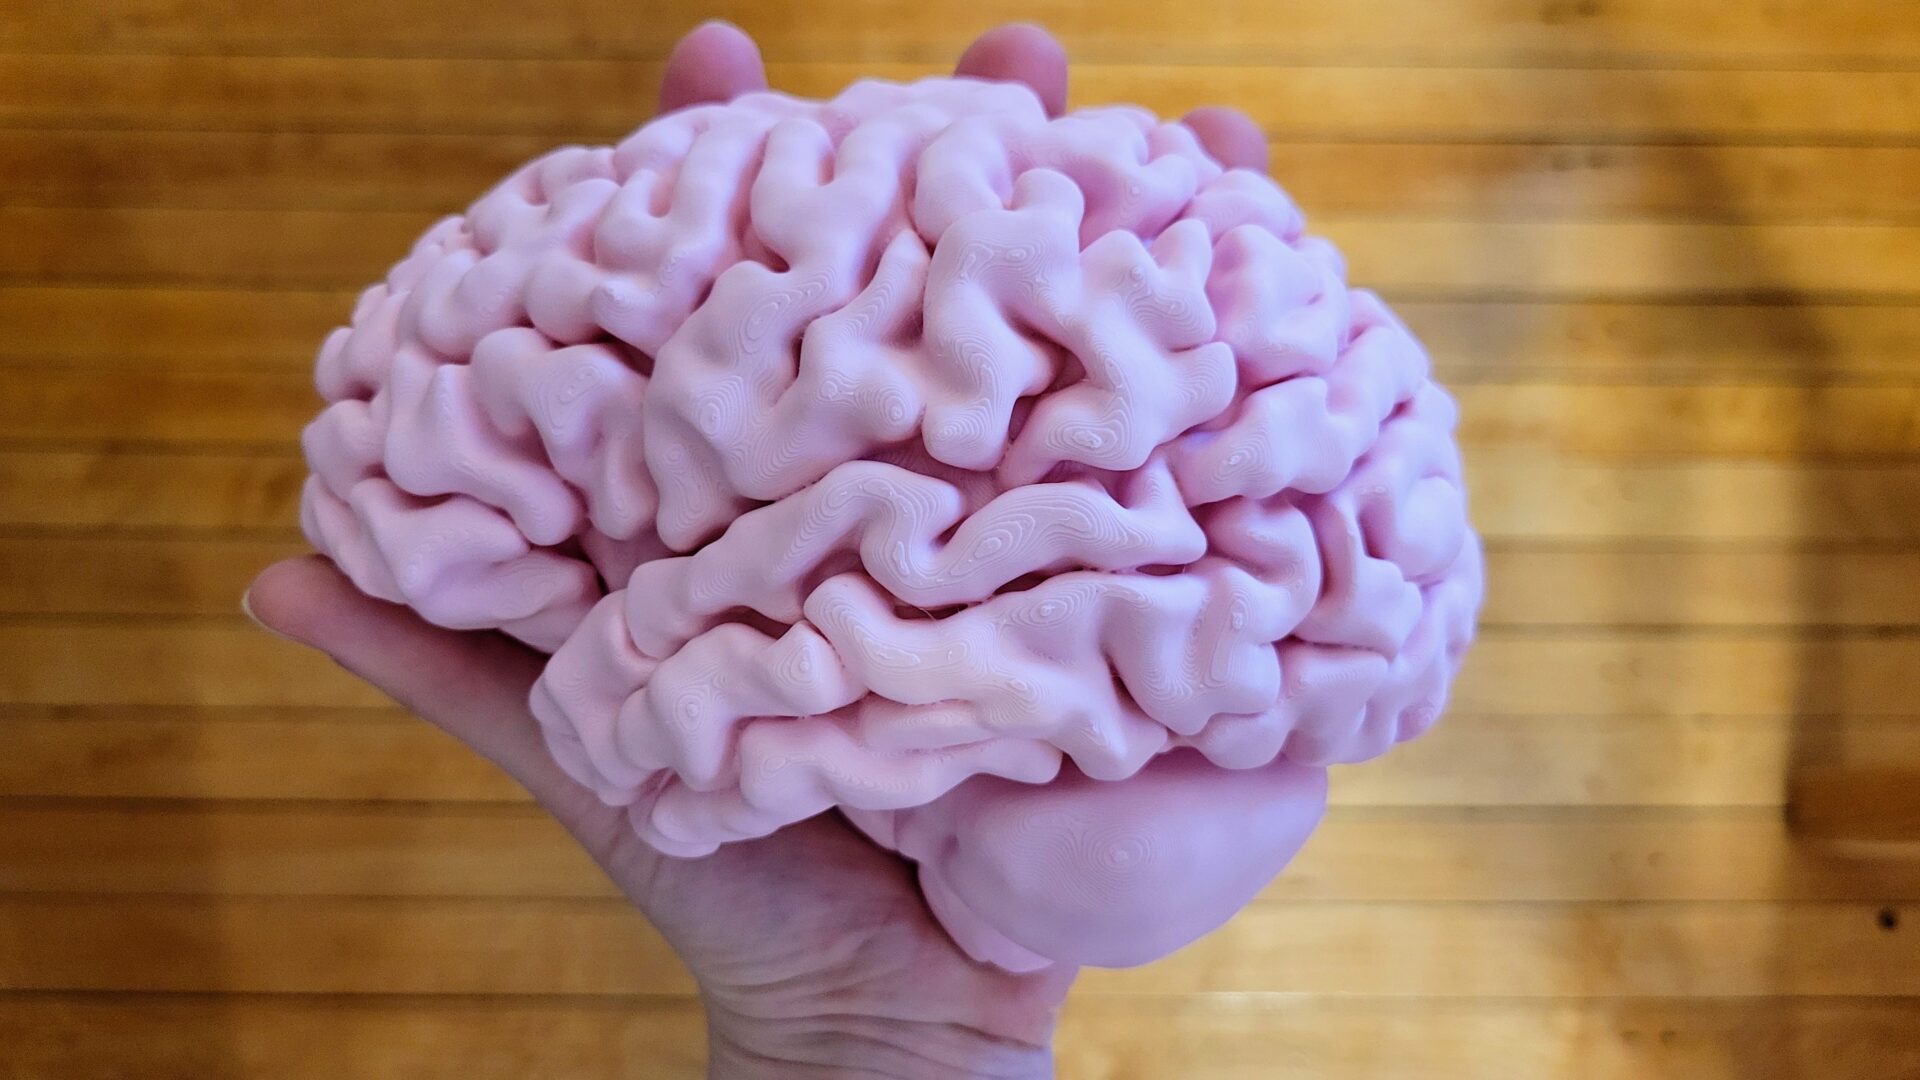
Now check out my finished brain hemisphere. Pretty sweet, right?
The inside doesn’t look quite as clean, because it was printed on support material. The structure is still really clear. If you look closely, you can also see the boatload of magnets on all the surfaces that touched the print bed. In the top back, you can spot a spot with a similar issue to the mini-brain: the support material didn’t stay stuck to the bed, so there was nothing supporting that particular little gyrus. Not worth re-printing my brain for.
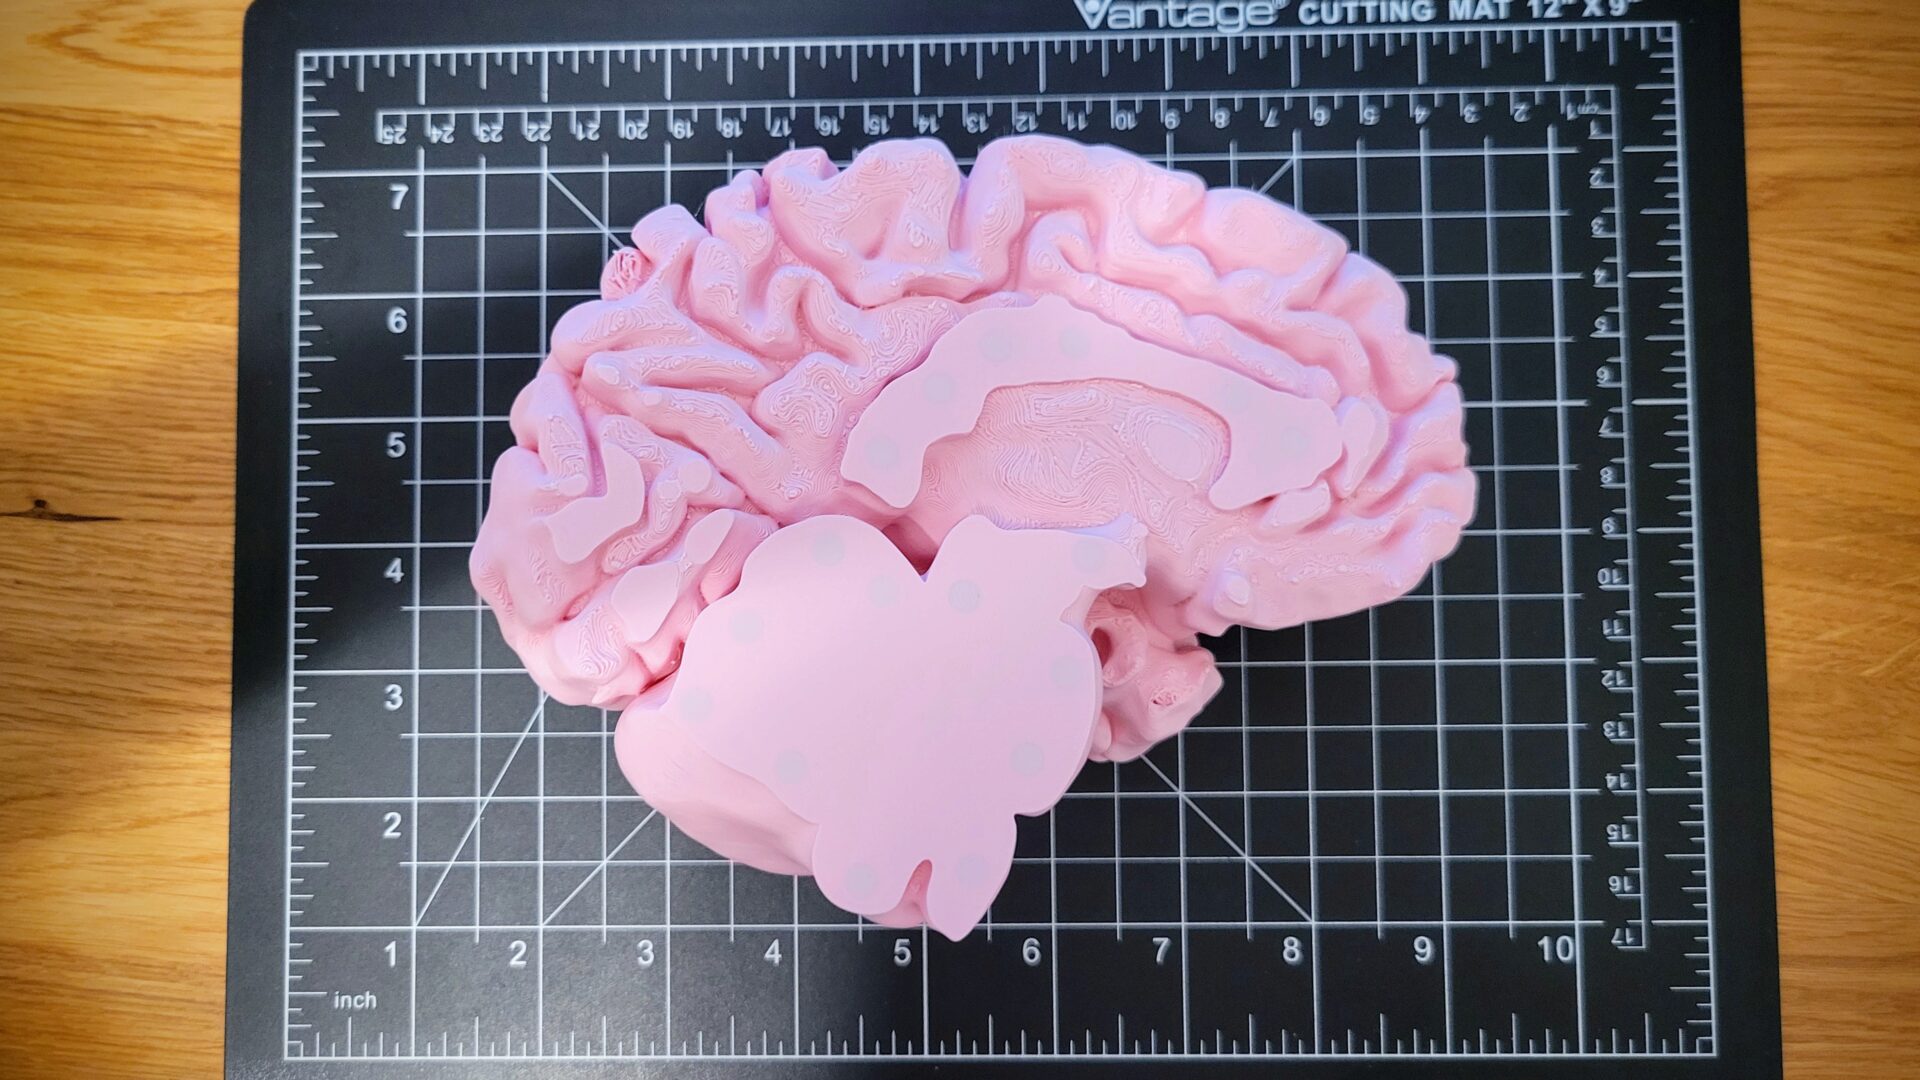
Then just repeat with the other half, and I’ve got a whole-ass brain. It snaps together perfectly with the magnets. It feels really solid with the magnets holding it together (they’re not coming apart by accident), but it’s still relatively easy to twist or pull apart the halves.
If you look at the bottom, you can nicely make out the pons and medula. They also mate together very nicely, so there’s only a very thin seam between them. That makes me glad that I used the smooth print surface!
People seem to be very impressed by my brain. People ask if they can hold it, like it’s fragile like a real brain, and get excited that they can even see the inside. I also get asked if it’s the real size. I hold it up to compare it to my head – yup, it’ll fit in there!
Display stand
There’s still one piece missing from the full 3D printed brain experience: I need a way to display it. What good is it if I can’t show it off?
I decided to make it a plaque-like display stand, like it’s in a museum display. Because of the weird structure of the brain surface, I though the best approach would be to make a cylinder that intersects with the brain model, then boolean subtract the brain from it, with an offset.
I was sort of right. I made it work, but it took a lot more time than expected with Blender sculpting tools. The first problem was figuring out where to have the brain intersect the base cylinder. Ideally, it would be directly below the center of mass, so it would sit evenly. I don’t actually know where the center of mass is, though, so I just kind of guessed. I also picked a spot that would have good registration features to line the brain up, overlapping with the pons (part of the brain stem) and temporal lobes.
The issue with my boolean-and-offset approach is that the brain has to be set in and removed, so there can’t be any features that are wider at the top than the bottom. If there’s a good systematic way to create that, I don’t know it. It was just me eyeballing it in Blender, trying out various sculpting tools because I don’t know the right one. And just deleting chunks of vertices, then trying to fill the hole with a face that I subdivide and smooth out. Plus there were weird self-intersections that popped up and I fixed manually. (Again, maybe there’s a “right” way to fix that, but I don’t know it and couldn’t find it with my naive googling.) It’s not pretty. I also made a couple of test prints of the part of the base that interfaces with the brain, then went back to my model to remove more of the base to let the brain fit in.
Once I was satisfied with the interfacing part of the stand, I also had to model the base. Originally, I was going to do that in Blender too. But I was afraid of screwing it up, especially with the inability to go back in the timeline or change parameters/dimensions, like you can in CAD software. So I took another hacky approach: I created the base platform in OnShape, exported it to an STL, imported it into Blender, and boolean added the meshes together. Like everything else I’ve done with Blender so far: it’s hacky, but it worked.
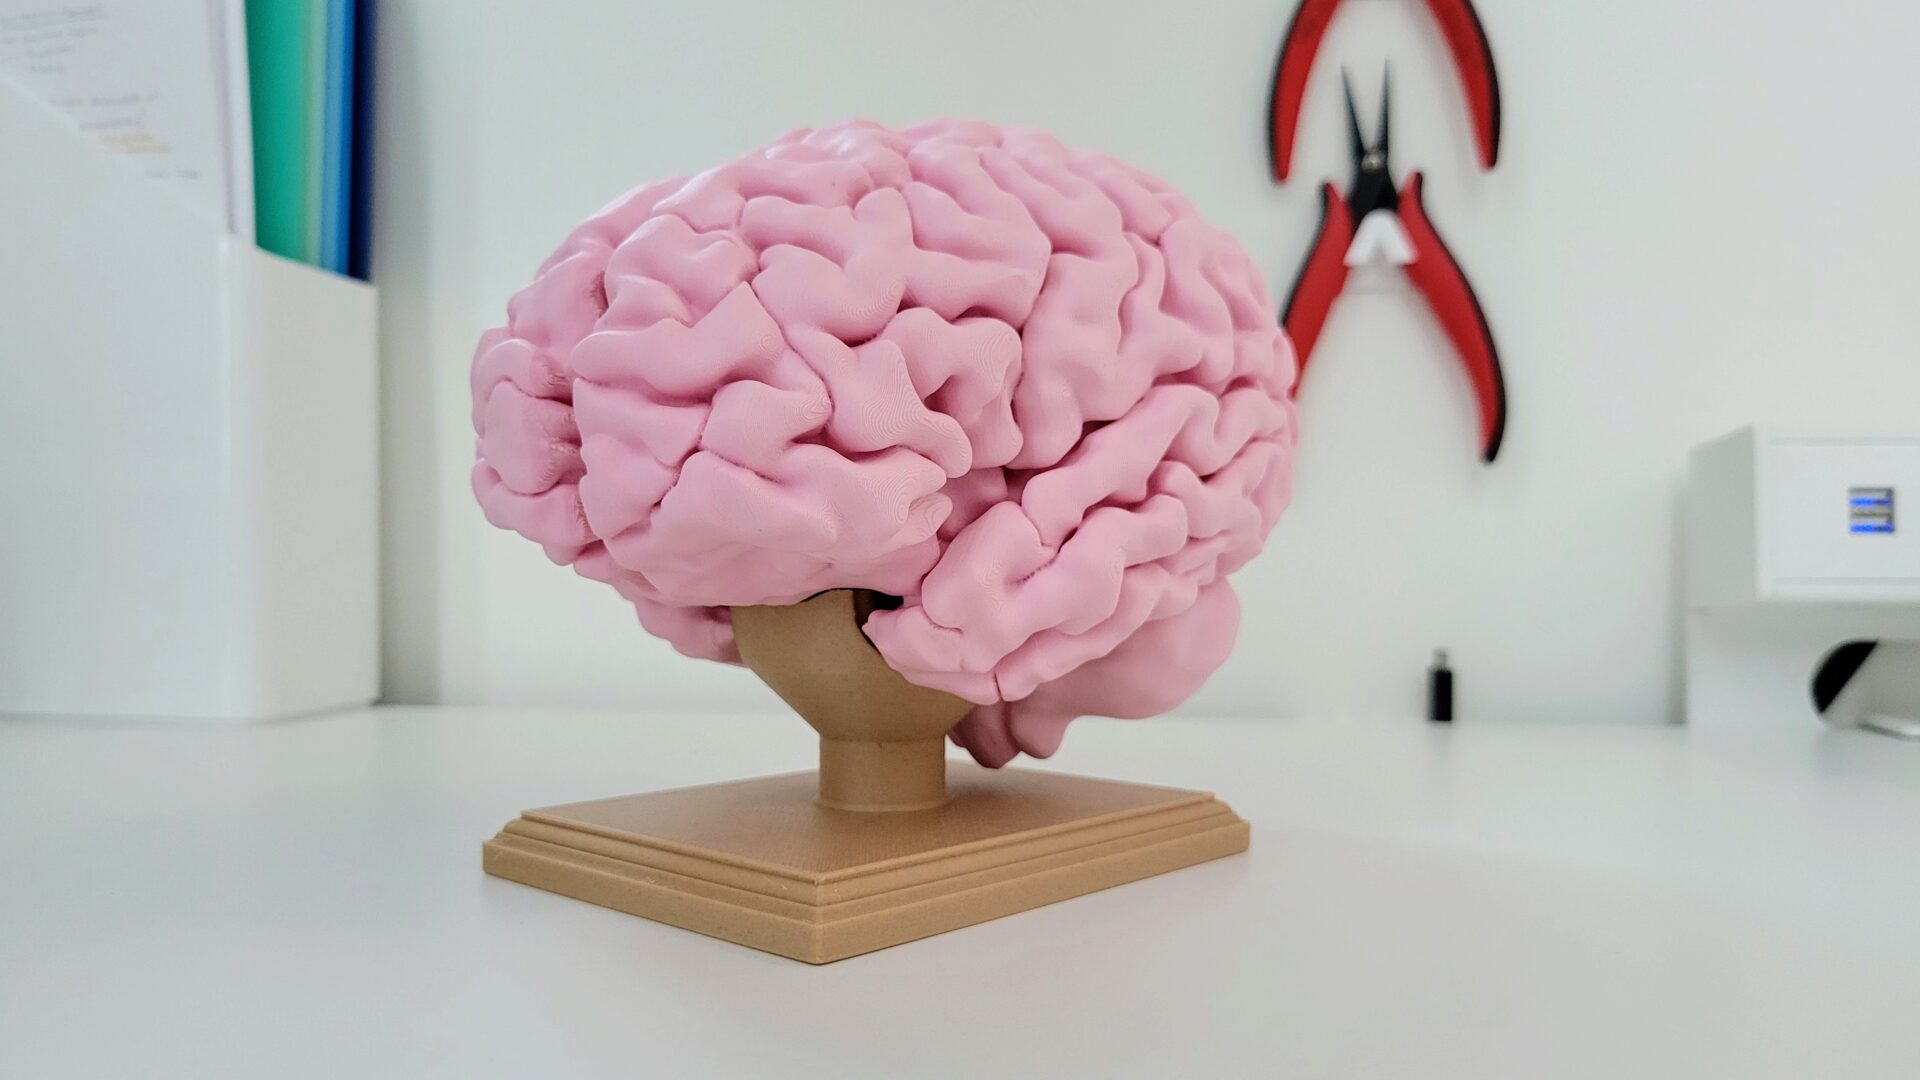
I printed the base with woodfill PLA. It came out smaller than I expected (like most things I make in CAD), but it holds up the brain, and the mounting point is close enough to the center of mass for it not to tip over. If I really want to complete the look, I should get a little brass plaque to add to the base. Or get a real wooden base with a brass plaque, and just drill a hole to add my cylindrical mount. Something like this, but not $65. I can do that when I have a real job with a real office to display my brain, so I can be as ostentatious as possible.
But in the meantime, I bet I still have the best decoration in the building.